An important role in creating a cozy atmosphere is played by decorative gizmos and compositions. But not always and not all may have enough money to adequately decorate their home with expensive decorations. Making such interior items with your own hands often becomes the best way out of the situation, in addition, such needlework brings a lot of pleasure - both the process and the end result. To date, moths and butterflies have become a popular type of home decoration. These creatures fluttering on the walls can cause a lot of positive emotions, recalling beautiful sunny days. We will devote our article to the review of various possibilities of independent decoration of walls with butterflies, and also we will consider methods of their manufacture.
Butterfly Wall Compositions
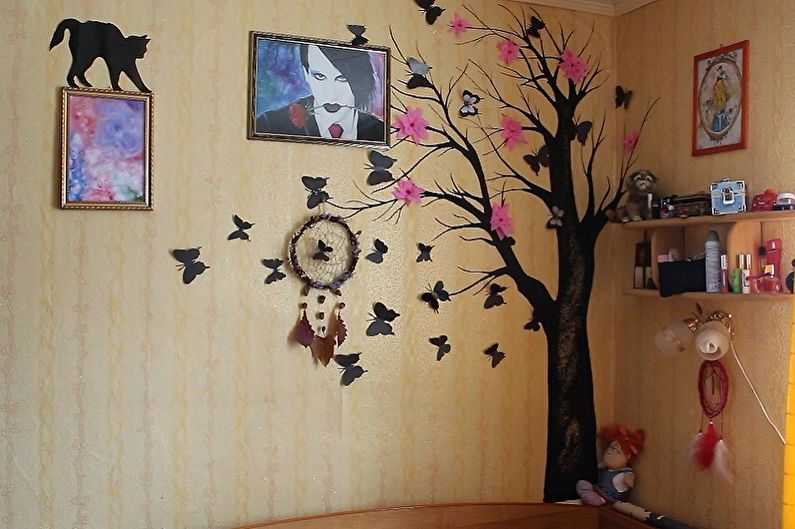
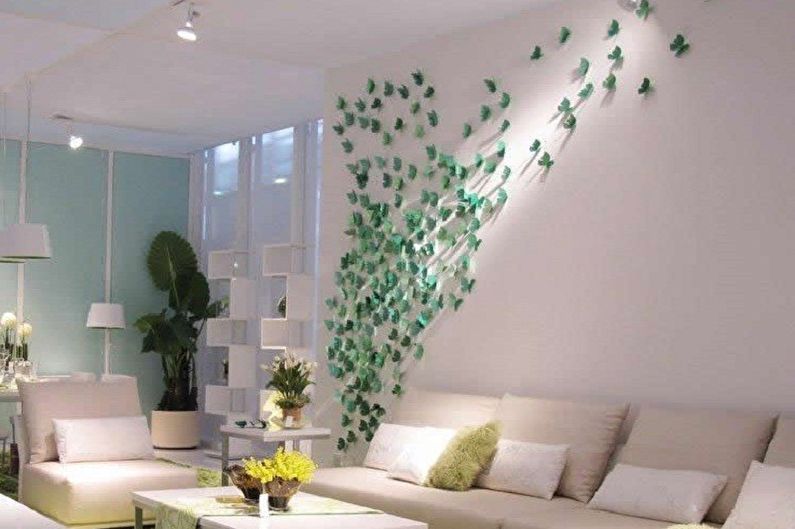
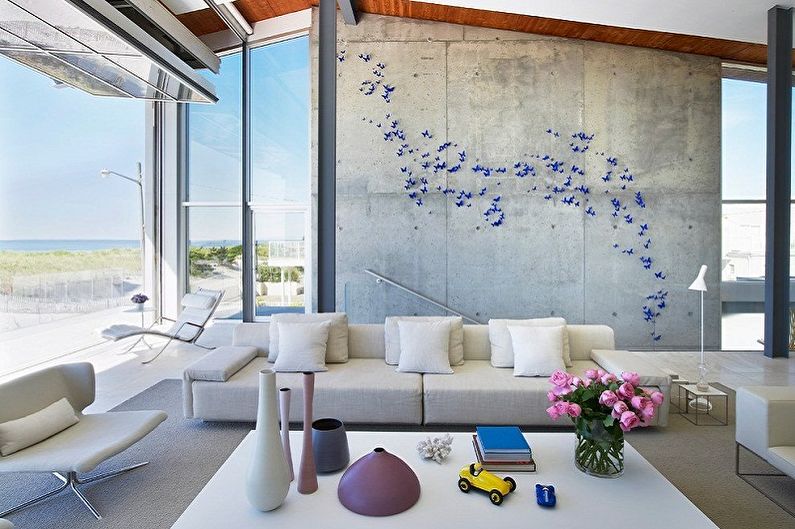
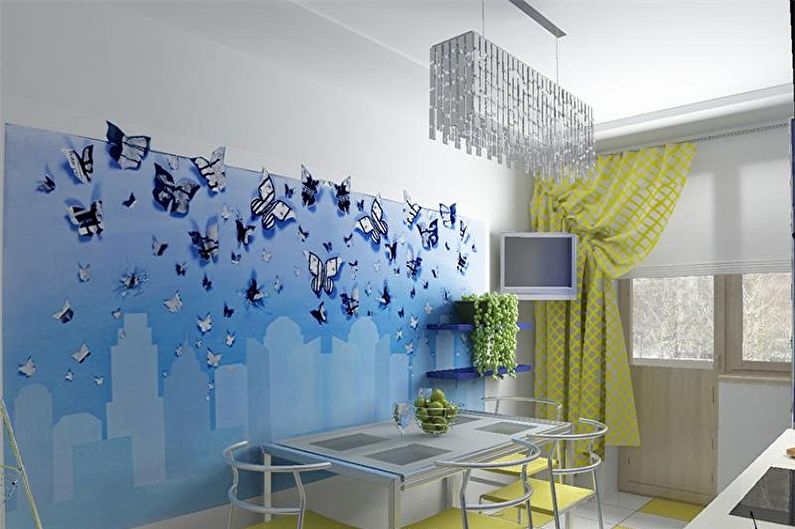
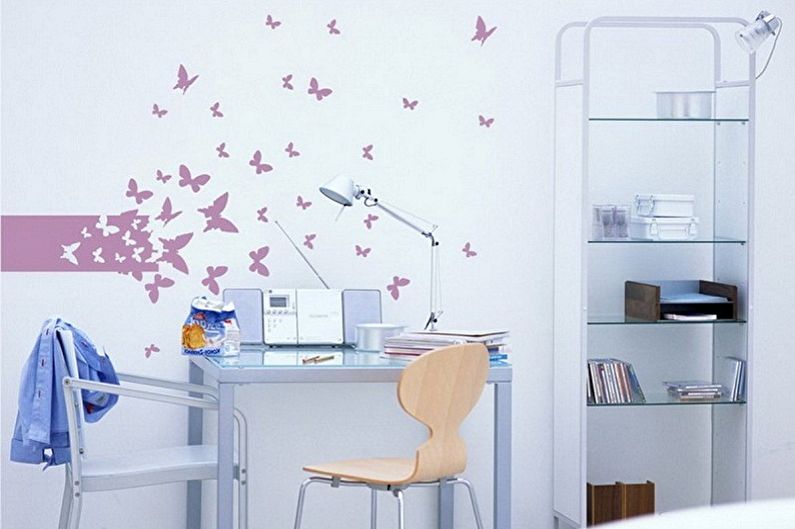
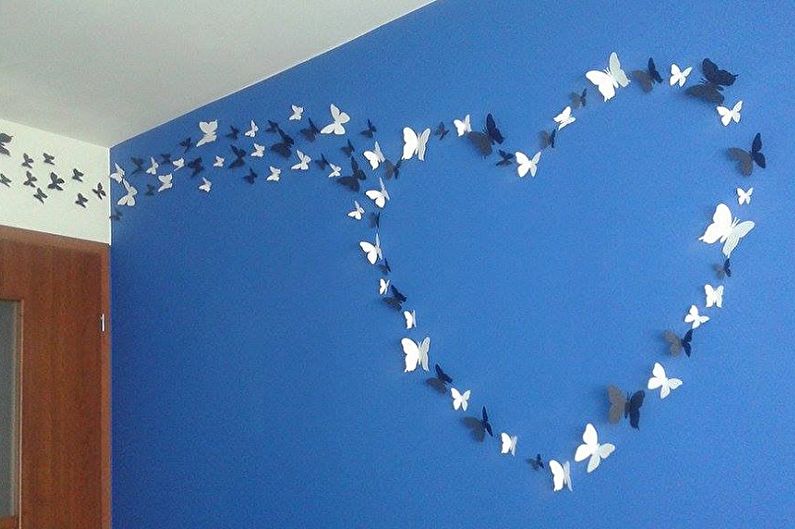
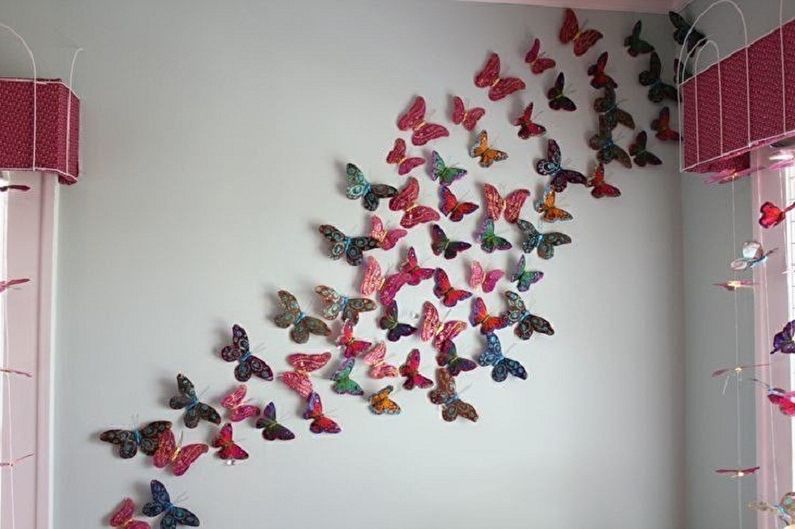
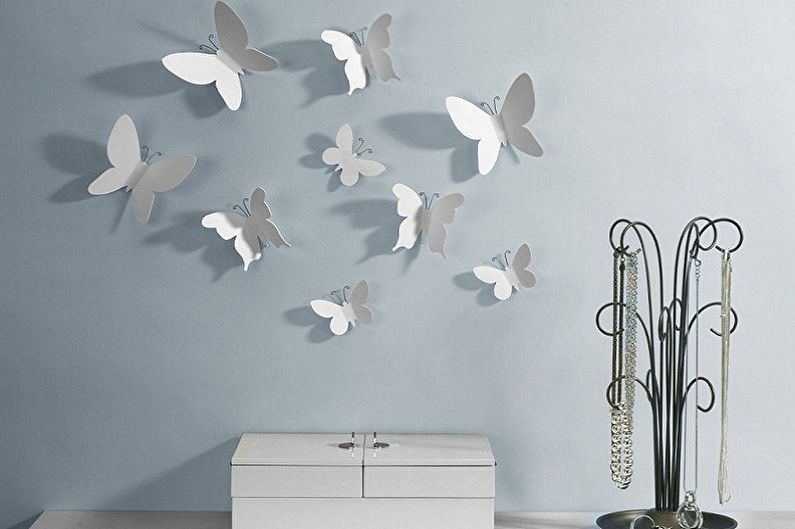
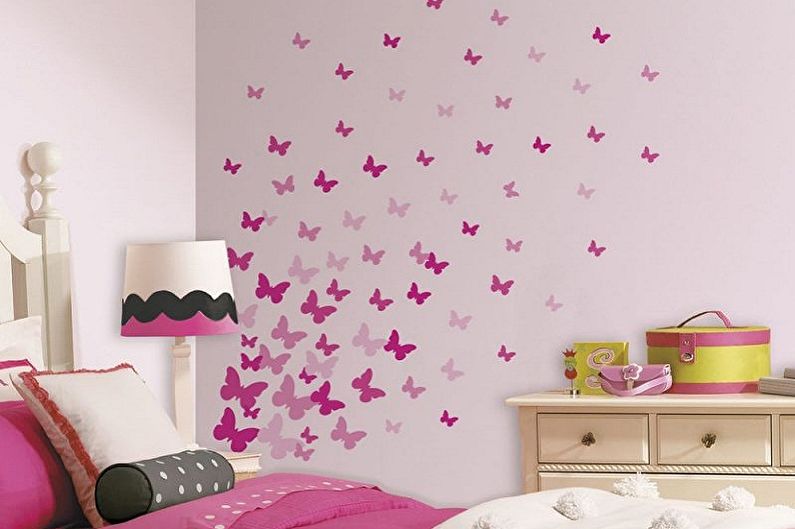
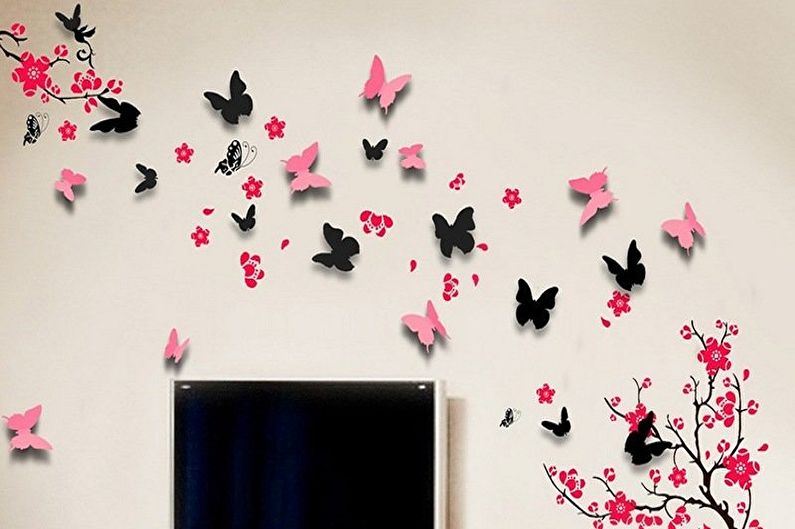
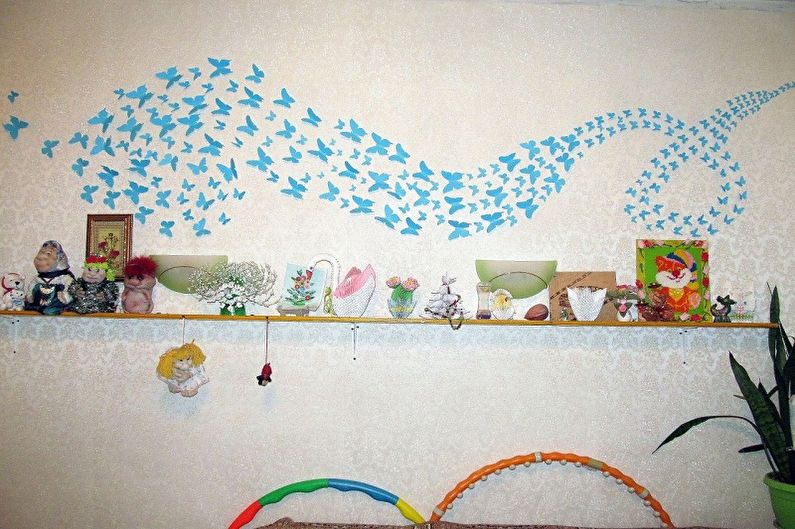
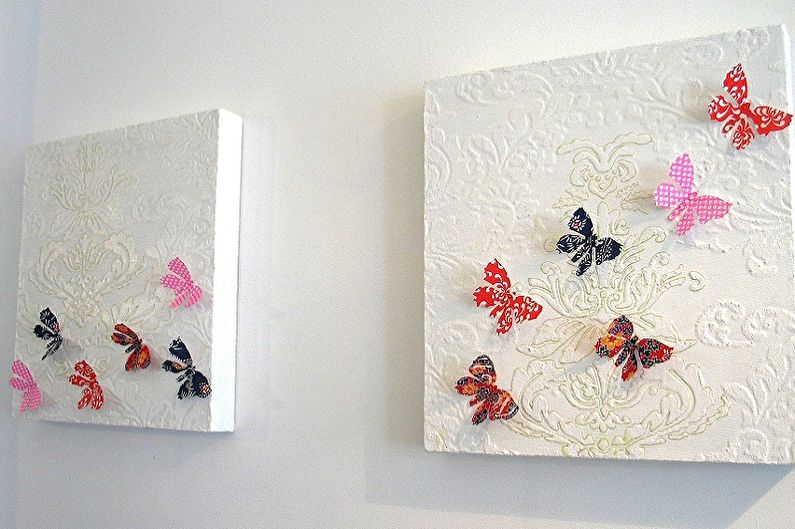
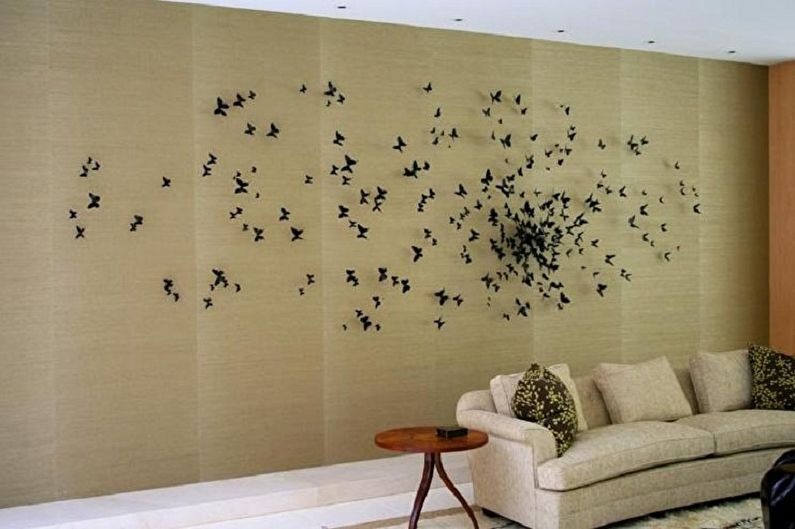
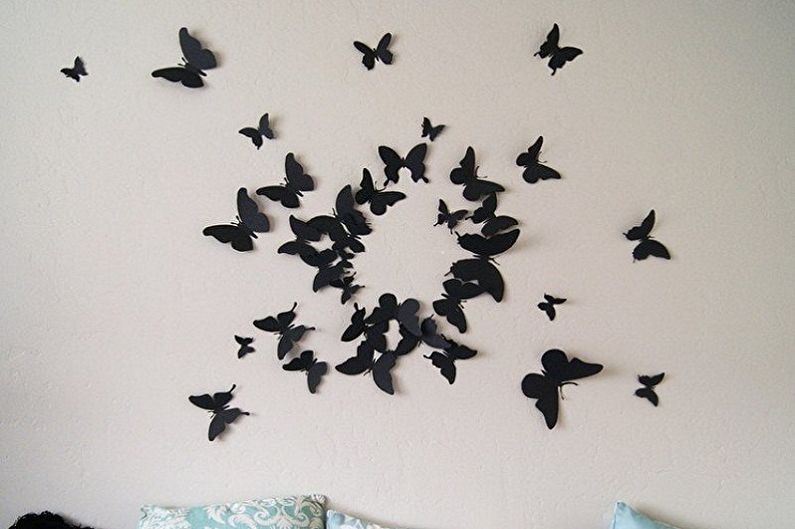
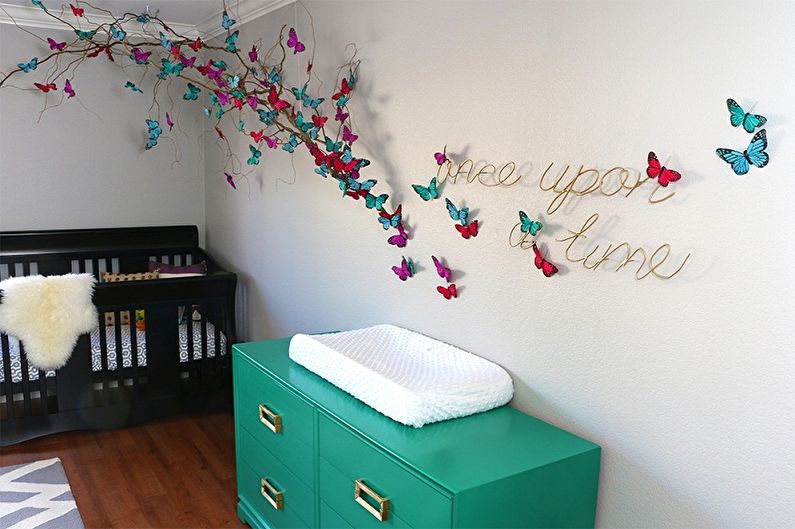
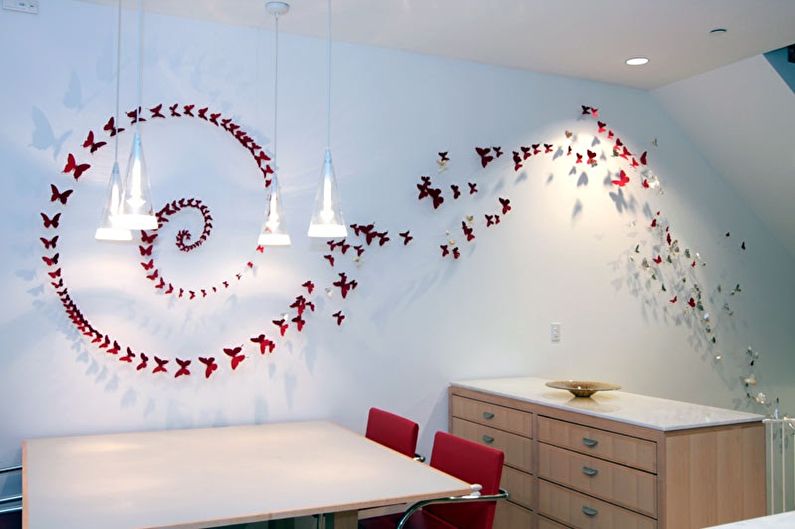
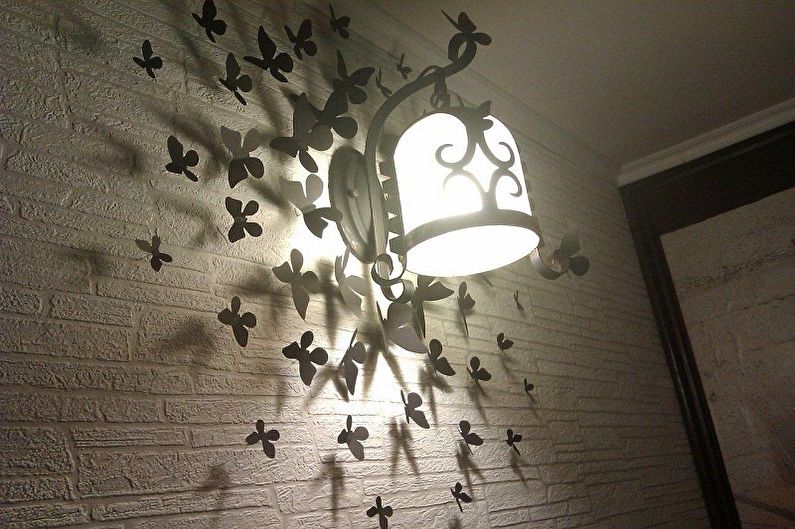
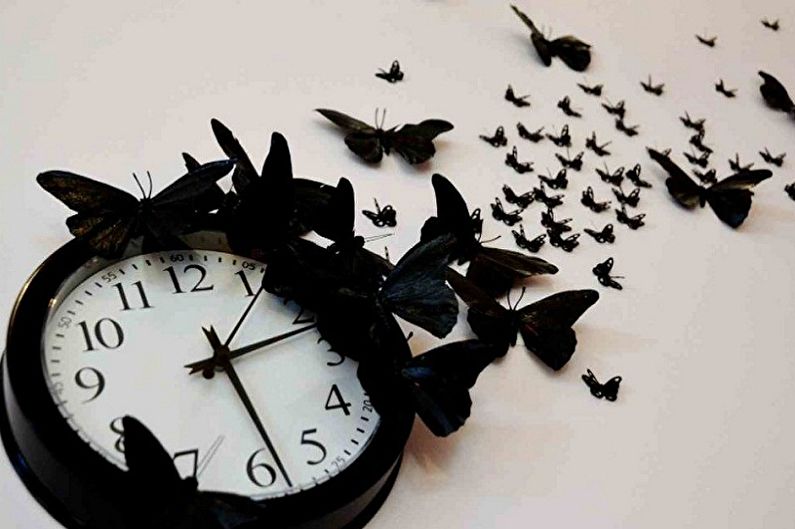
Butterflies in the interior of a room can be represented in different ways: they are placed in the form of panels, scattered in chaotic or ordered compositions, they decorate certain areas (for example, around lamps, artificial trees, etc.) or painted on the walls, often with the use of luminous paints. One has only to look at the photo of the beautiful panel in the form of a scarlet heart from butterflies, as soon as you want to place this romantic composition in your bedroom.
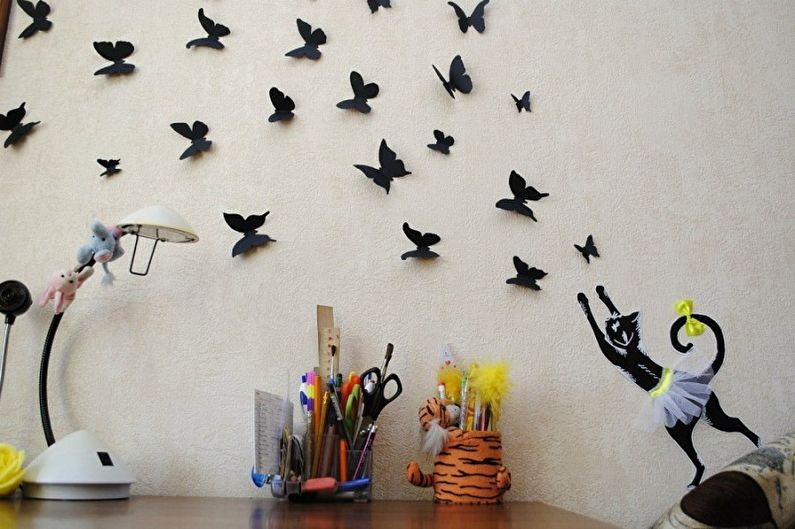
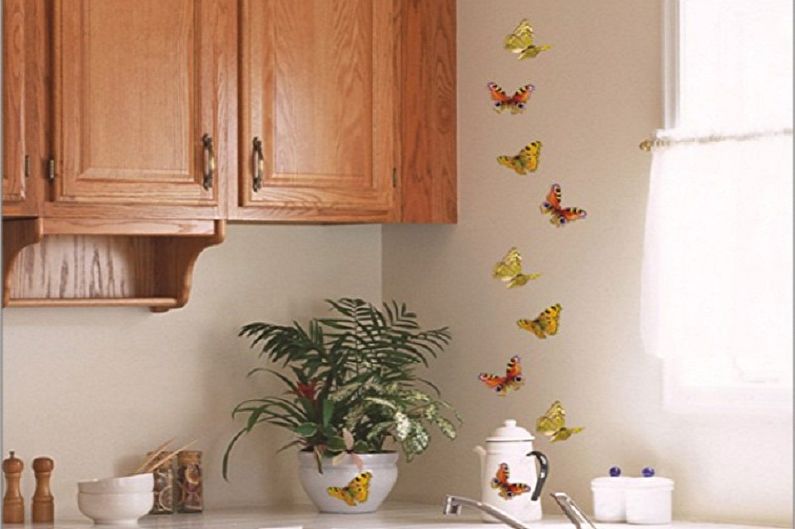
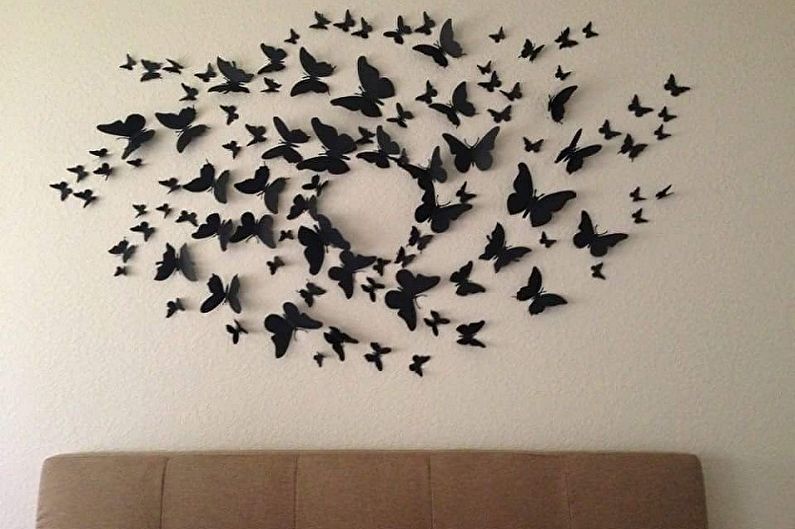
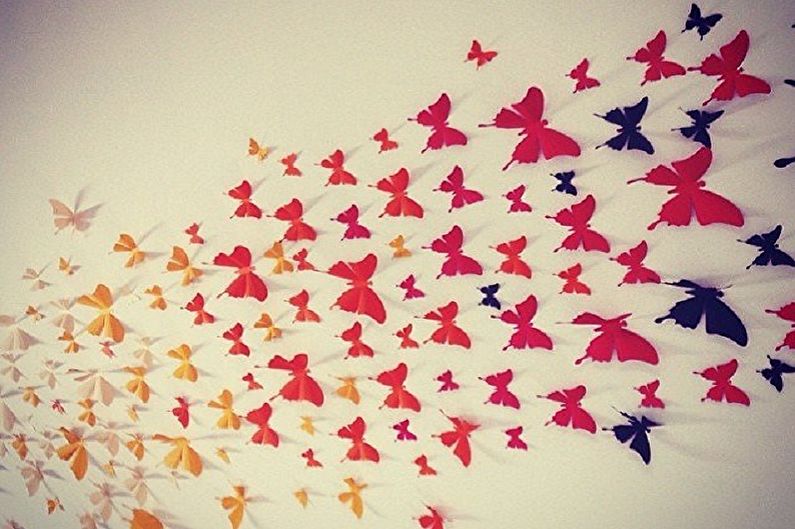
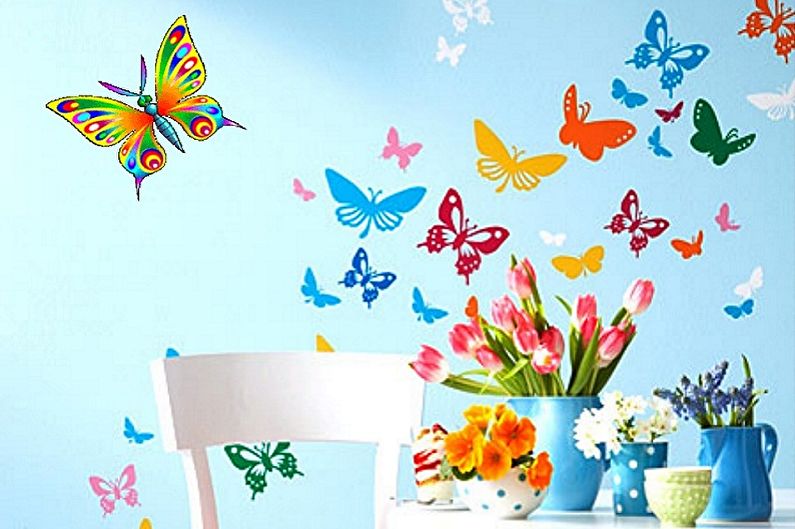
The advantage of moth decor is their ability to complement the interior of any room, regardless of its functional purpose and present style. It is important to choose the right color scheme so that it matches the overall design. For example, on a beige wall, red or green moths will look great, on a white - black. In the children's room, you can create multi-colored paintings from butterflies, fluttering merrily over the crib, and in the living room, decorate an empty wall with a swirl of solid butterflies.
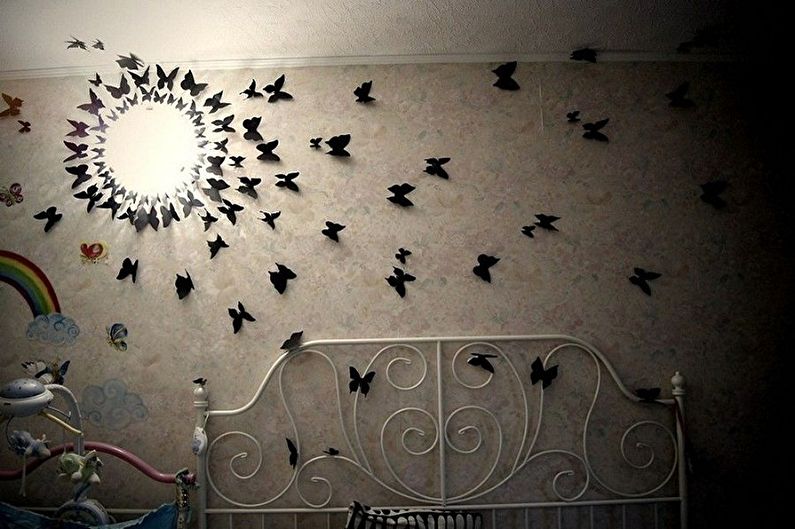
Luminous moths created with the help of special paints look unusually beautiful. In the evening, they become the original decoration of the room, reviving it and filling it with mystery.
DIY butterflies on the wall: manufacturing methods
If you decide to decorate the apartment yourself with such decorations, we suggest that you familiarize yourself with the various ways of making butterflies. Although the work will require some expenses, time and perseverance, the result, believe me, will undoubtedly please. To make the composition look more natural, it is better to make moths of different shapes and sizes for it, using templates that you can draw yourself or take ready-made ones from the Internet.
How to make butterflies from paper and cardboard
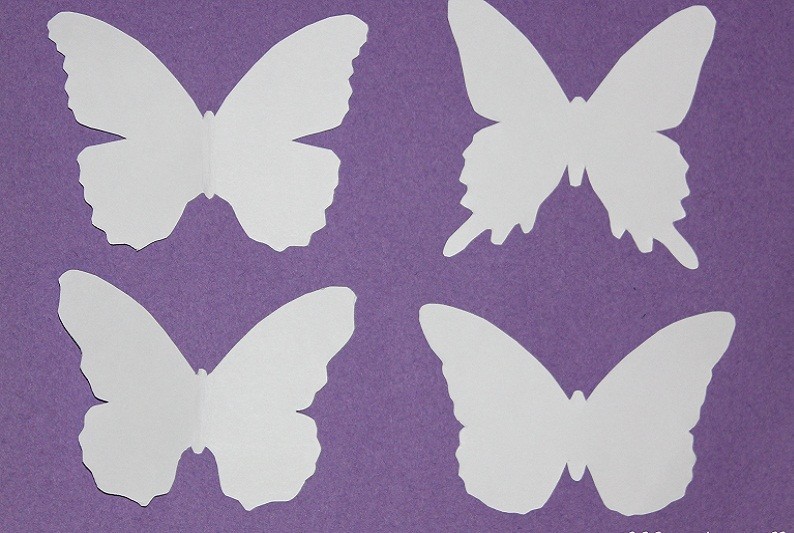
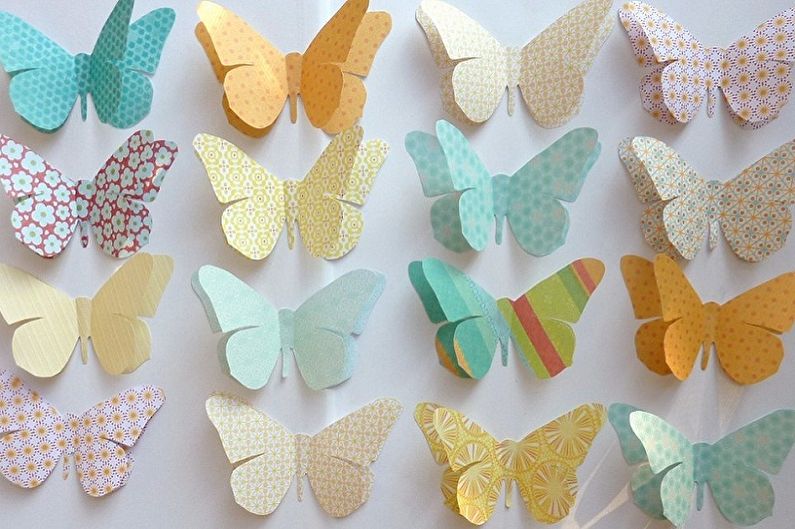
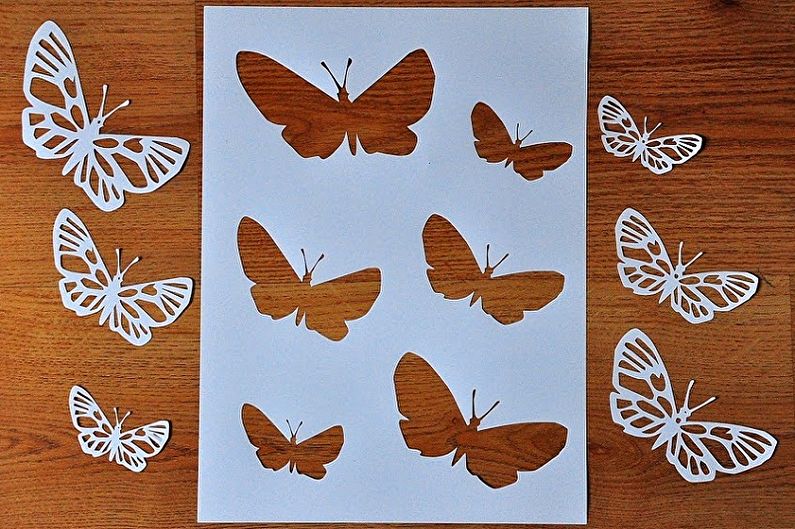
The easiest way to make butterflies from paper. To do this, you can take white sheets and decorate winged beauties at your discretion, or get a set of colored paper. The advantage of this material lies in the simplicity of working with it; therefore, it is quite possible to attract a child to production by designing, for example, a panel of butterflies in a nursery. In addition to paper for work, you will need accessories such as scissors, templates, pencils, PVA glue (for bulk products).
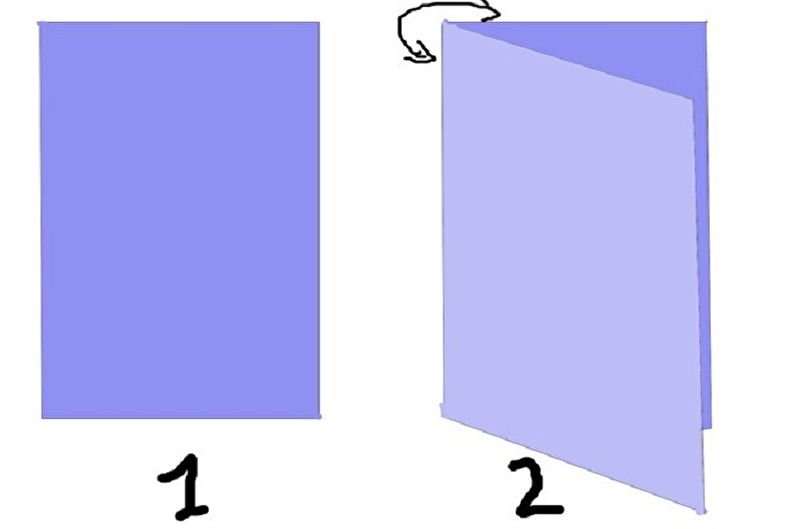
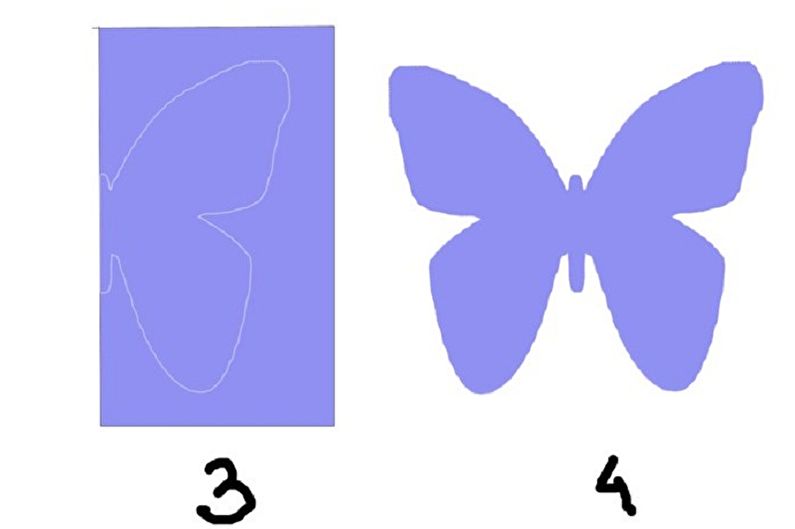
There are two ways to make a butterfly out of paper. The first is to take the finished template and use it to transfer the outline of the moth to a sheet of paper, cut with scissors. The second way is simpler. First we cut out a square (rectangle) from the paper, fold it in half, apply a half-butterfly pattern to the fold line, circle it with a pencil and cut it out. Then we unfold and get a beautiful moth.The advantage of butterflies cut out of paper is their lightness - if a light draft is blowing, their wings will move like real ones.
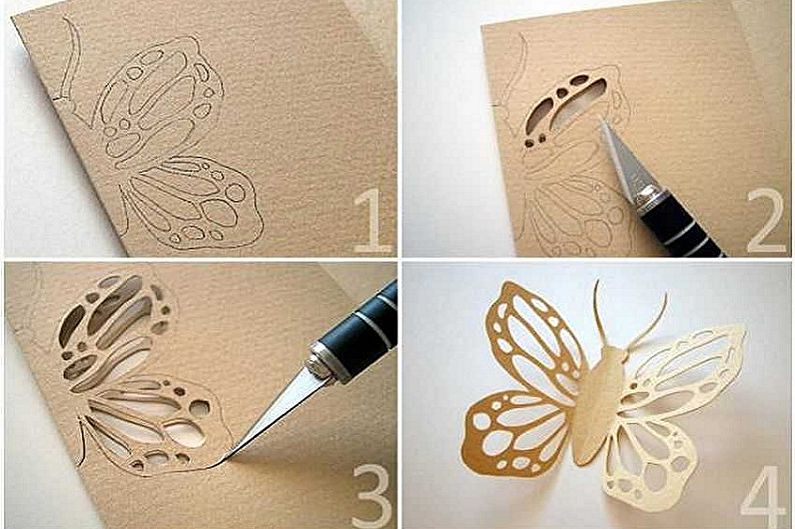
You can give the wings of the butterfly more elegance by cutting out previously drawn internal details with the help of nail scissors or a clerical knife. To make a magnificent butterfly, two identical blanks are cut out of paper of different colors or the same, and then glued. In this case, the lower plane - the base - can be simple, and the upper one is decorated with patterns or clippings. For fastening use double-sided tape.
The cardboard butterfly is also cut in two ways - using full or half-mask. As a basis, you can use not only ordinary colored cardboard - multi-colored moths cut from old postcards and magazines look beautiful.

Corrugated Paper Butterflies
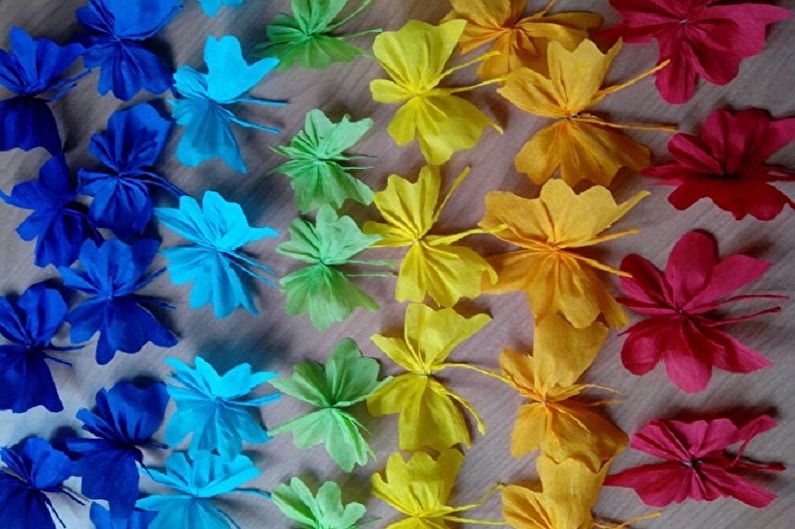
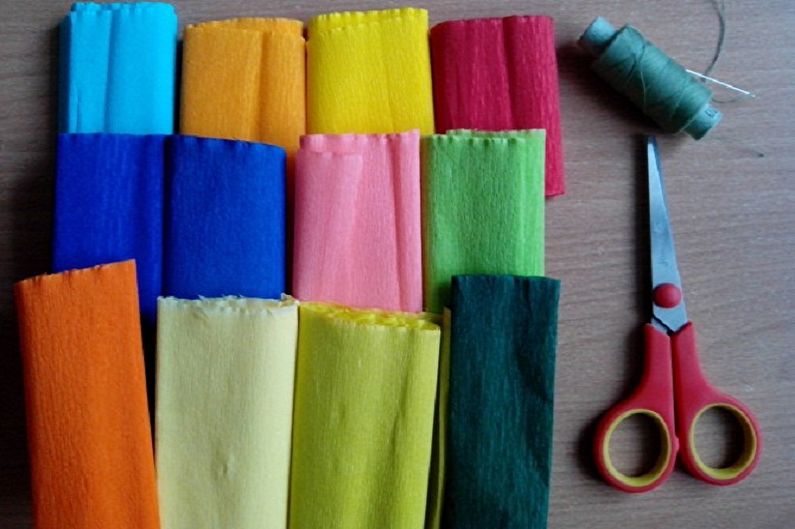
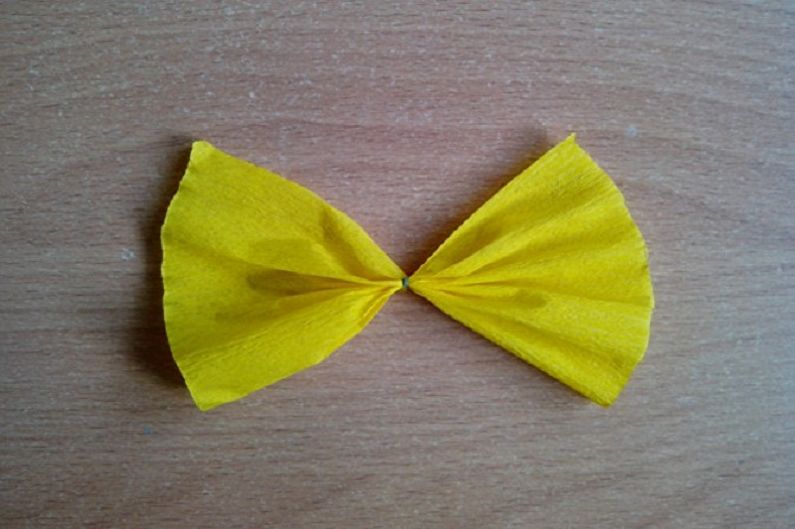
One of the successful ways to make a volumetric moth is to use corrugated paper. For this, you need to additionally prepare a needle with a thread. On sale you can find material of various motley colors and create a real colored moth cloud.
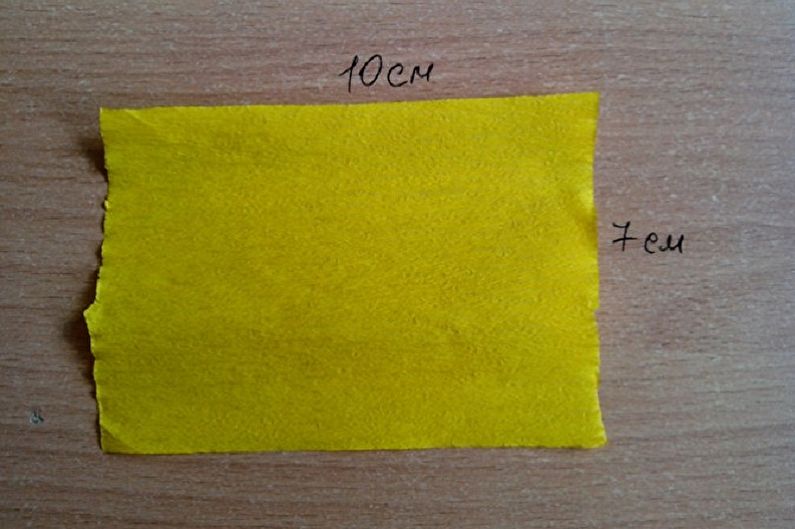
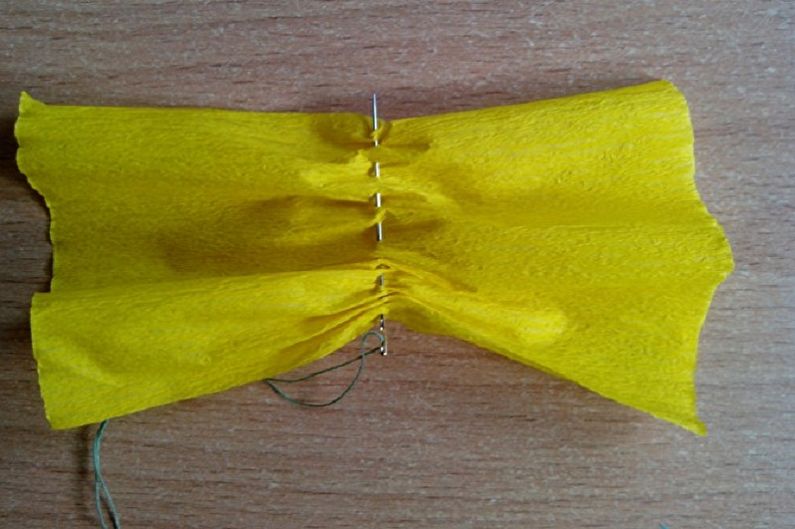
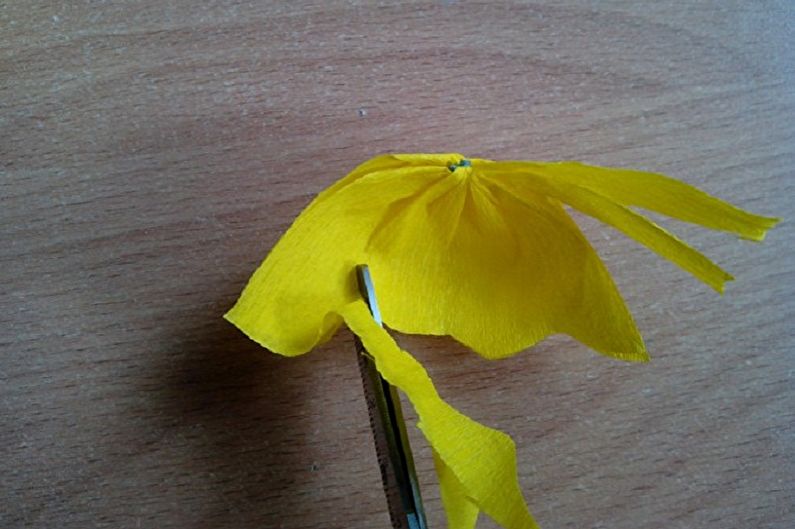
First you need to cut out a strip of paper measuring 7x10 cm (you can use other sizes depending on the desired size of the butterfly). Using a needle with a thread, we form an accordion in the central part and tighten, as shown in the photo. We fold the resulting side canvases, connect them, and slightly stretching them to the sides, we get rid of the folds - we have obtained a blank of two wings, which now need to be given a beautiful wavy shape. It is necessary to cut two wings at the same time, not forgetting to also select areas for antennae. In this case, templates are not needed - the form can be given at your discretion.
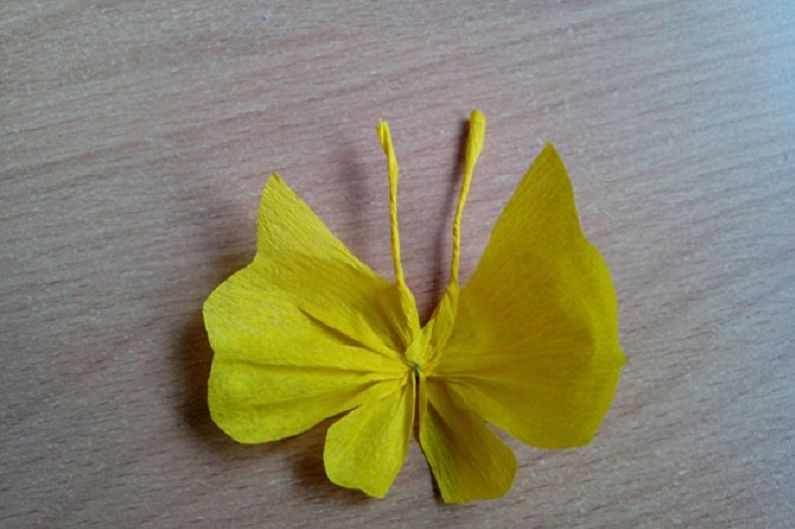
At the final stage, deploy and straighten the workpiece, and twist the antennae with your fingers. The butterfly is ready!
Origami paper butterfly
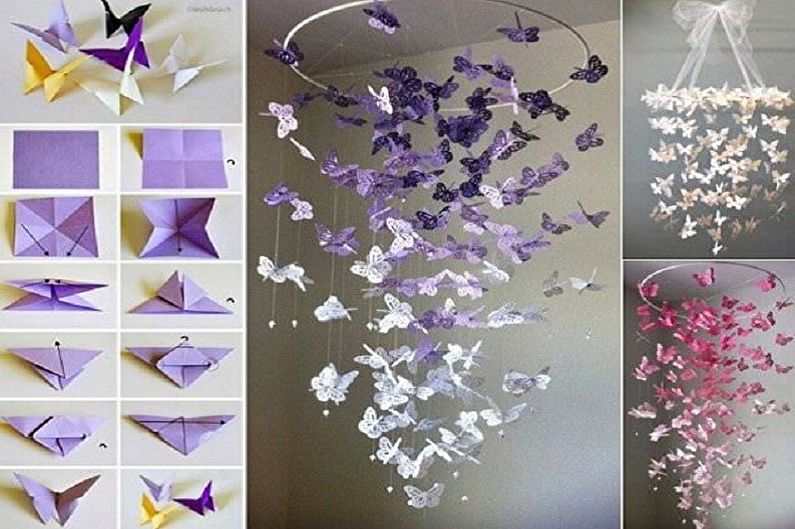
A beautiful, voluminous butterfly can be made using the origami technique. Make it a little harder than in previous cases, however, when you make a couple of such beauties, things will go much faster. Beginners need to use the schemes of such work, which are quite a lot on the World Wide Web, be patient and assiduous. Origami art does not stand still, constantly evolving, so there are a variety of ways to fold butterflies - from simple to modular, able to move wings, etc. Since we learn how to make an origami moth for wall decor, you can use the simplified technique.
First you need to cut out a paper square, bend it along possible diagonals and twice through the center. We fold the opposite sides, and bend the lower corner tops, turn over - we get a double triangle. We bend its vertex so that the tip is located above the entire part, after which we wrap it and fold it in half along the central guide. At the final stage, we fold the part twice. Making a volumetric butterfly in this way does not need to intensively smooth out the folds.

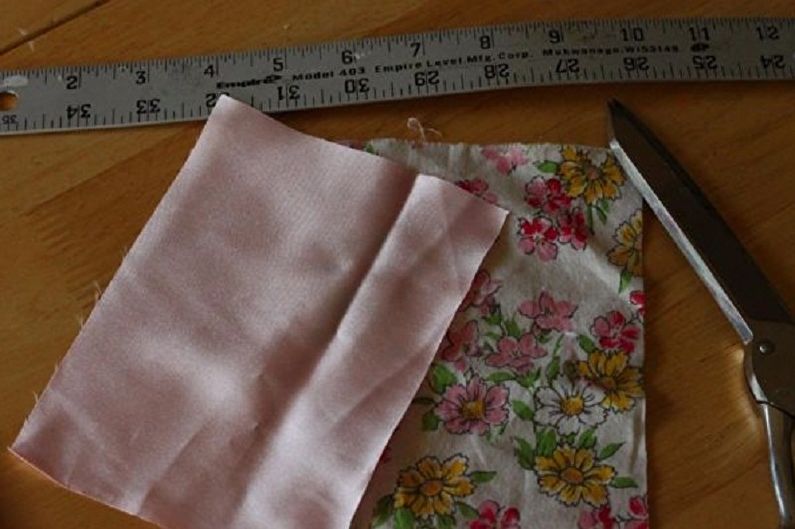
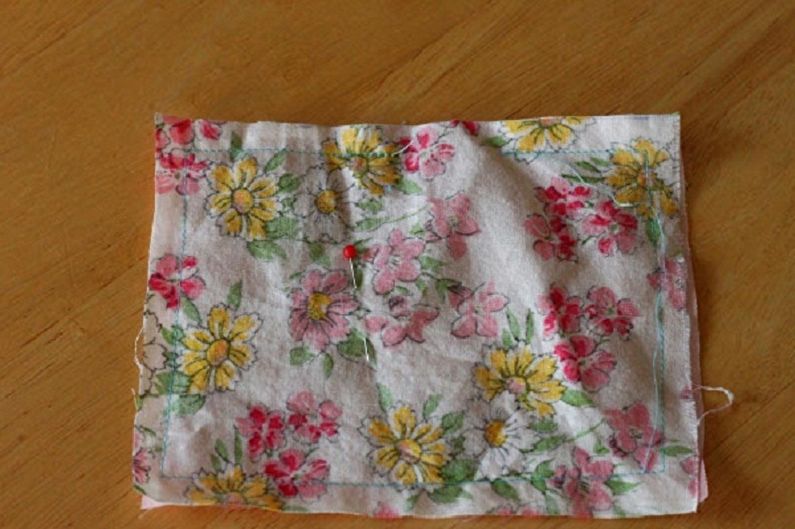
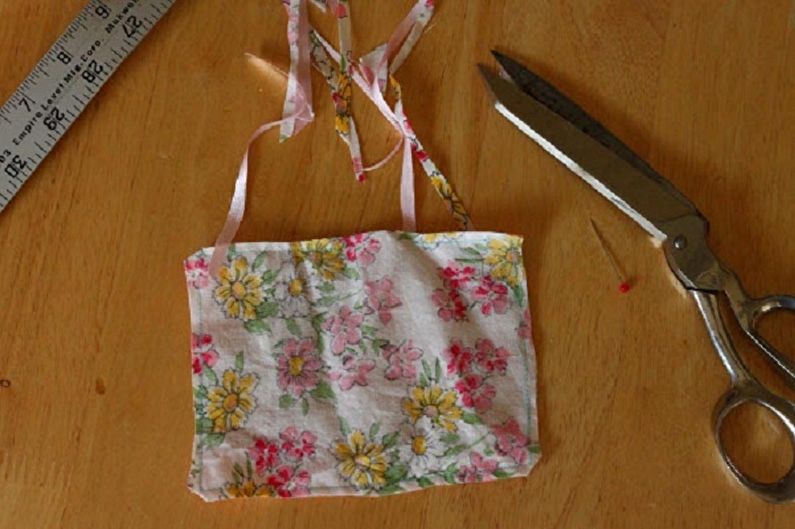
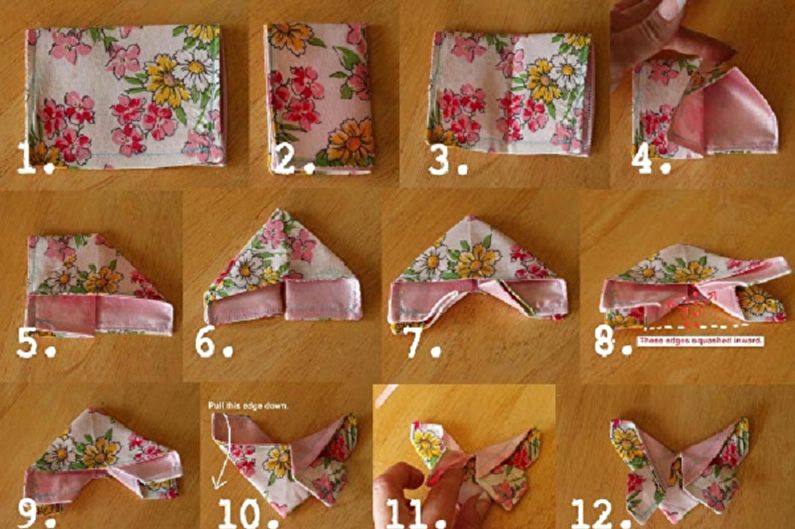
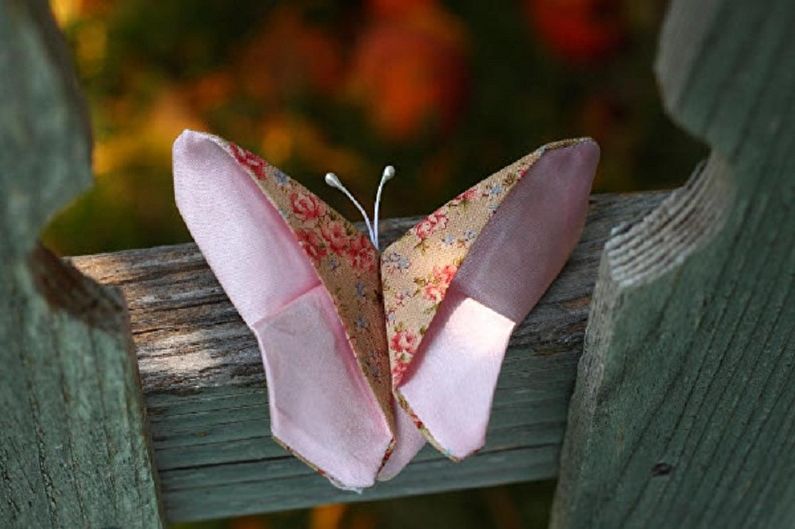
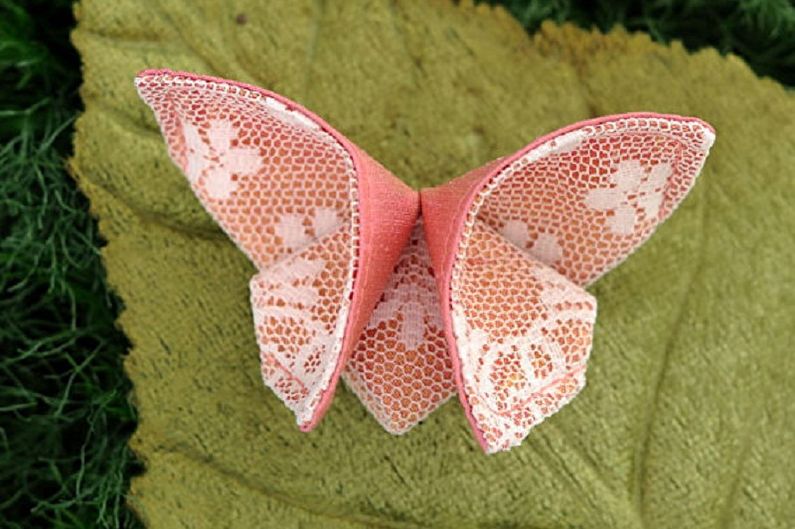
Making butterflies from fabric
Knowing the origami technique, you can make a magnificent butterfly from matter. To do this, you need two rectangular shreds from different fabrics of the same size. We sew them together around the perimeter - we get a canvas base, from which, following the step-by-step scheme presented below, we form the product. To fix all the necessary folds and the final structure, use an iron. Butterflies made of fabric will be an excellent decoration of the room. You can use materials of various colors and structures, including tulle and lace.
Tin Butterflies
If you still have empty cans of drinks, do not rush to send them to the trash can - they can be an excellent material for making shiny winged beauties.Using scissors, it is necessary to cut off the upper part and the bottom of the can, cut it in half, having received a canvas base. Next, use the template and apply the image of the moth to the surface, cut it out, giving the edges a wavy shape. To prevent the wings from twisting, you can give them a corrugated finish by making the longitudinal recesses with the blunt side of a knife or scissors. The resulting workpiece is decorated with multi-colored markers.

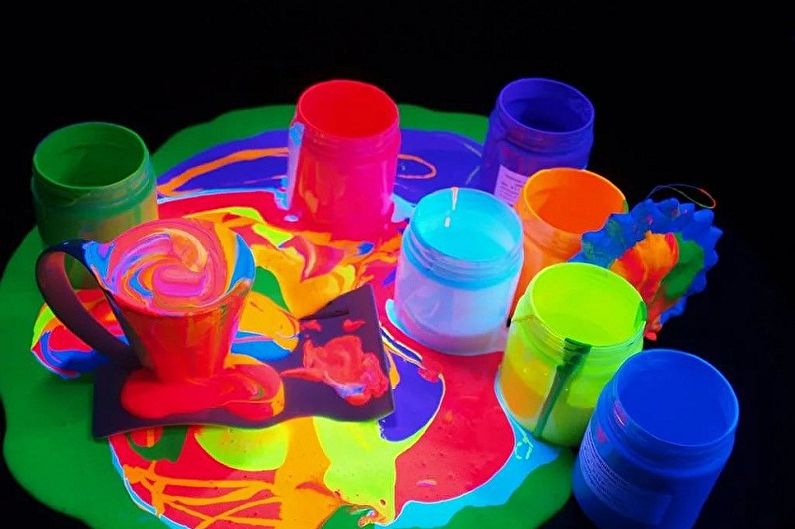
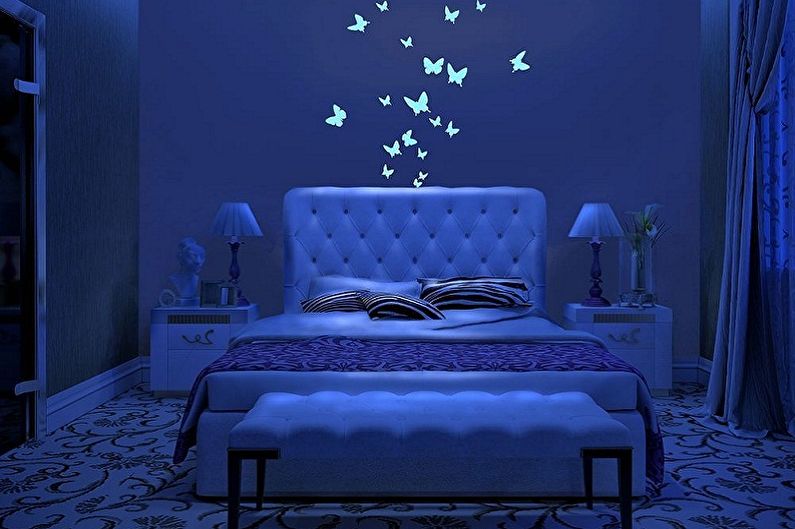
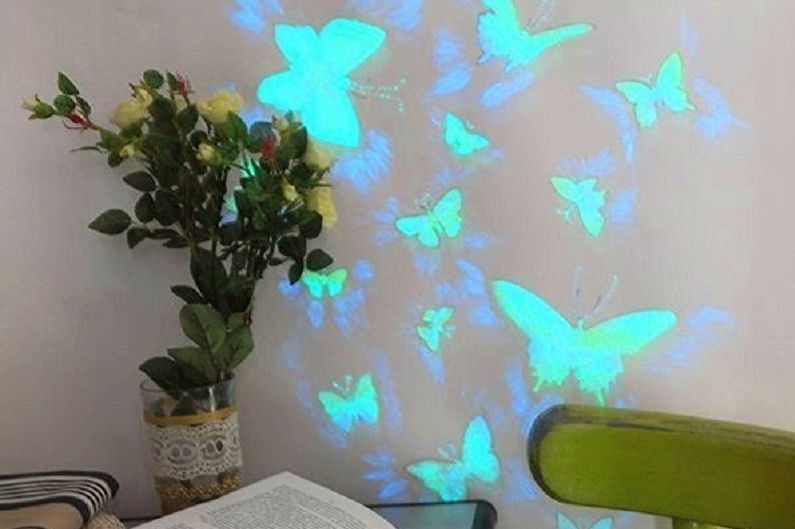
DIY glowing butterflies
Luminous moths look amazing and excellent in the interior, able to charm with their mystery in the dark. In this case, their images will be applied to the wall using phosphor paints. To get a glow effect, you need to make sure that there is some kind of light source next to the decor.
So, for work you will need paints of different colors, a sponge, a brush, glue spray and stencils. First, prepare the stencils of future moths from cardboard and glue them on the wall. We wrap a piece of the sponge to the brush and use this simple tool to color the butterflies. In order to better understand which paints will look more profitable, it is better to work in the twilight. After application, you need to wait a quarter of an hour and remove the stencils. The paints will completely dry after two hours, after which the contours should be drawn with a pencil. To “revive” the composition, you can apply additional strokes of paint near the wings. The decor is ready. We turn off the light and admire the beauty of our luminous fluttering moths.
Butterflies on the wall - photo decor
In conclusion, we suggest visiting our photo gallery. Here we tried to collect the best examples of decorating an apartment with butterfly compositions. We hope that these creative works will bring you a lot of pleasure and inspire you to create your own wall decorations. Enjoy watching!