Paper roses are an amazing and unusual decoration that can be used as an interior decor or an original gift. Using very simple techniques, you can make them yourself. Paper roses will fill your home with gentle warmth and comfort, and each of them will be awarded with the love of the author. A bouquet of such roses filled with sweets will make a memorable gift.
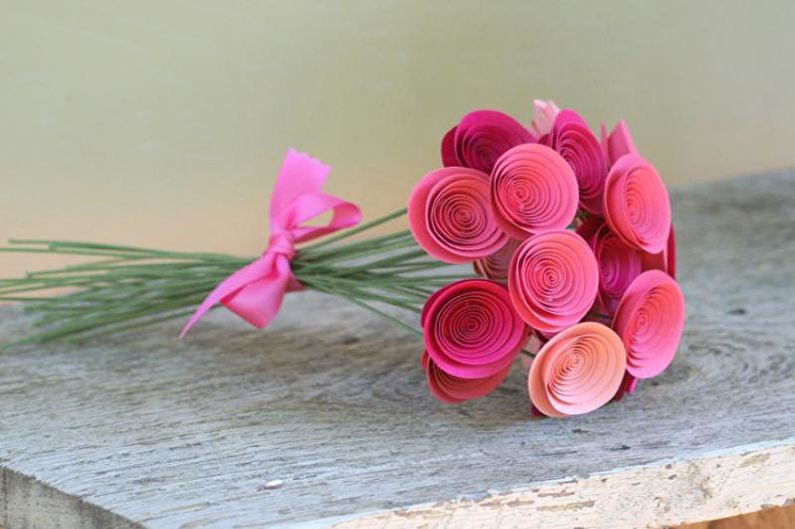
Spiral rose made of paper
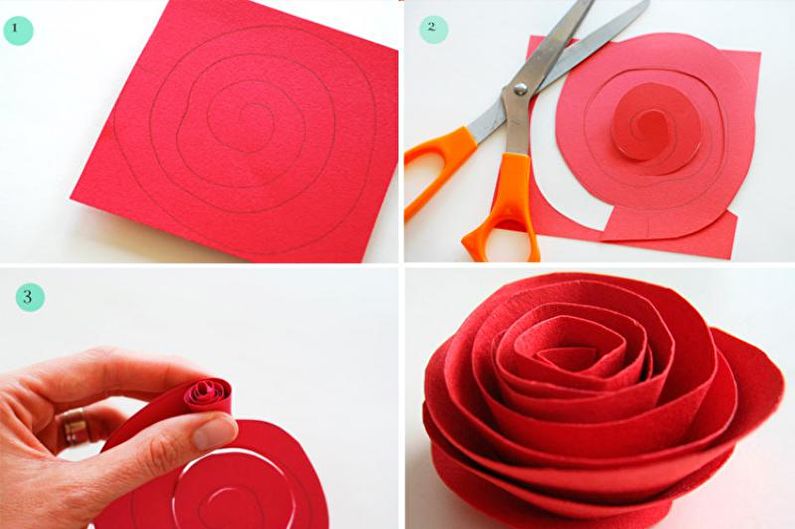
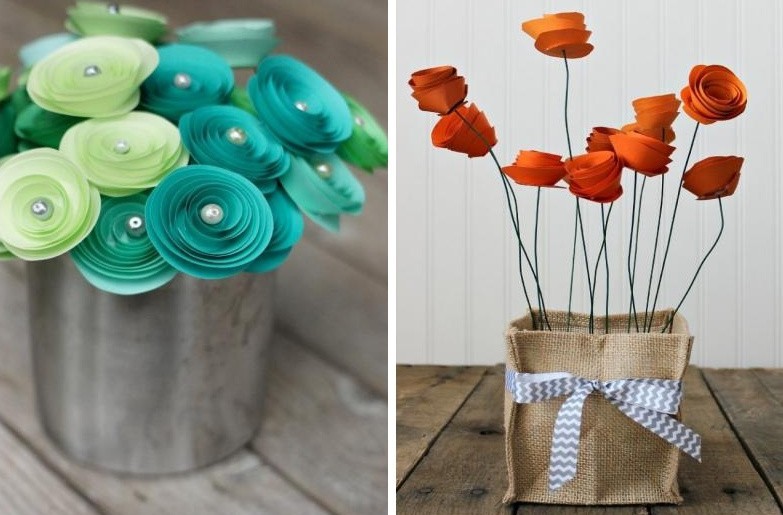
The most simple, but very interesting version of paper roses. To create it, you will need paper (the denser the better), scissors and any glue. Cut a circle from the sheet of the selected color. Its diameter can be arbitrary. Draw and cut the resulting circle in a spiral, tightly twist the part and form a bud. The easiest way to do this is from the outer edge of the spiral. Spread and glue the petals on the inside of the bud. For multi-colored roses, use paper of the appropriate shade or paint the finished white rose with gouache.
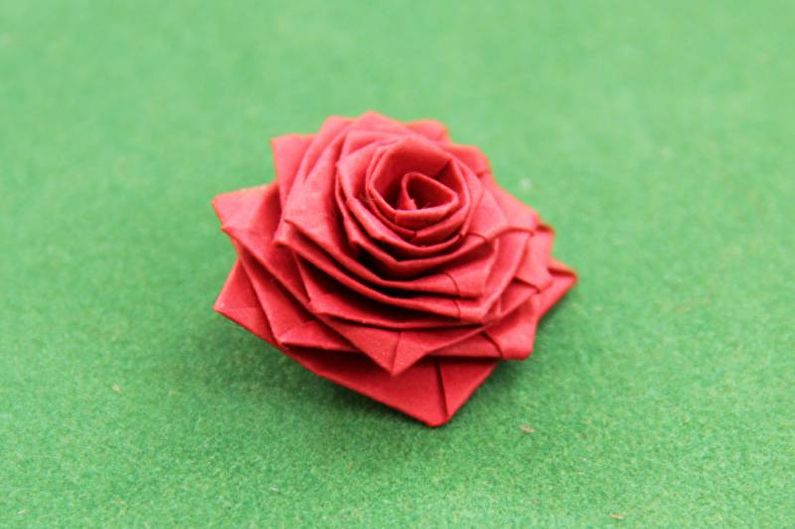
Corrugated Paper Rose
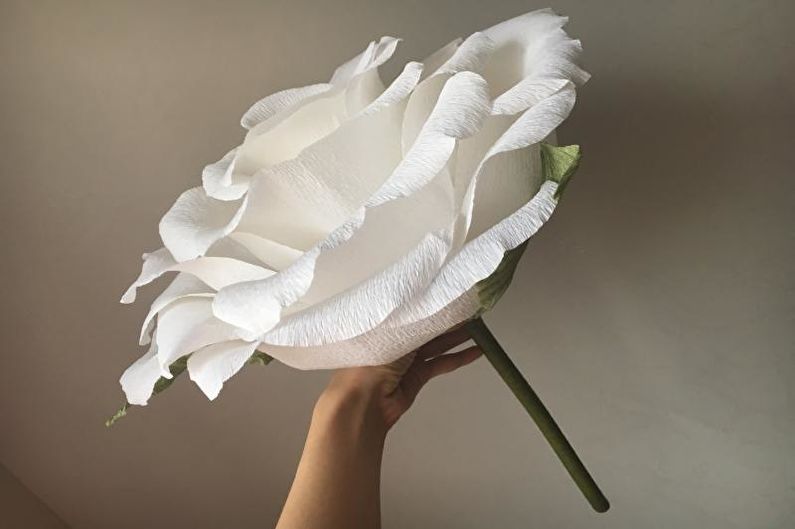
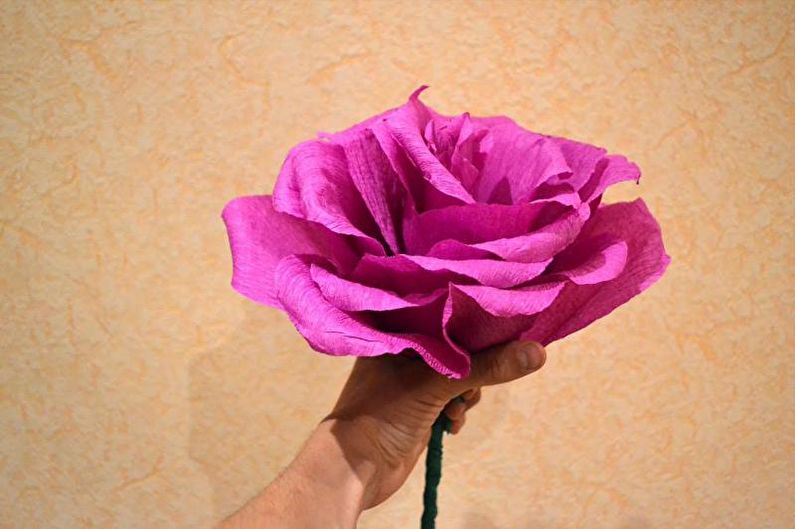
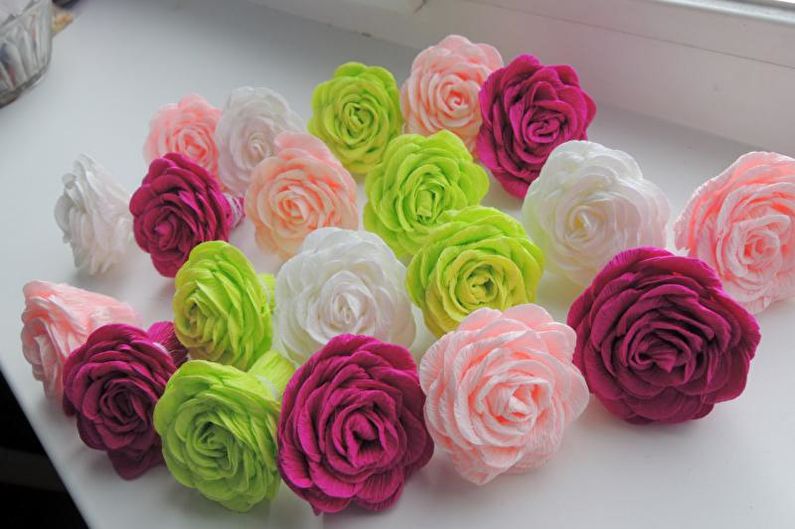
To make roses look as realistic as possible, use corrugated paper. It looks beautiful, very flexible and holds its shape perfectly.
For the manufacture you will need the corrugated paper itself of the required color, scissors and glue, and for the manufacture of the stalk - wire.
Having decided on the size of the bud, cut a strip of paper. Next, start winding a strip of wire, glueing each new round. Cut the petals of various shapes and sizes, then glue them to the base of the bud. Apply glue only to the bottom of the petal.
To make sepals, grab the green paper and stick it on the base.
DIY do-it-yourself rose
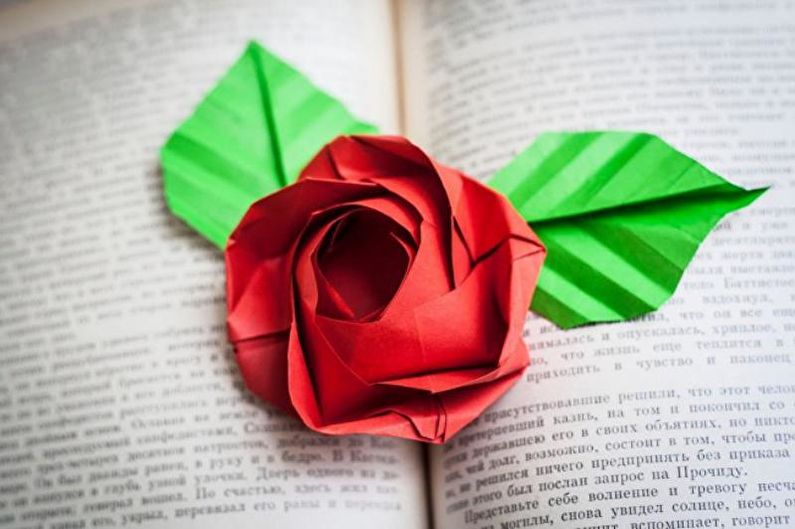
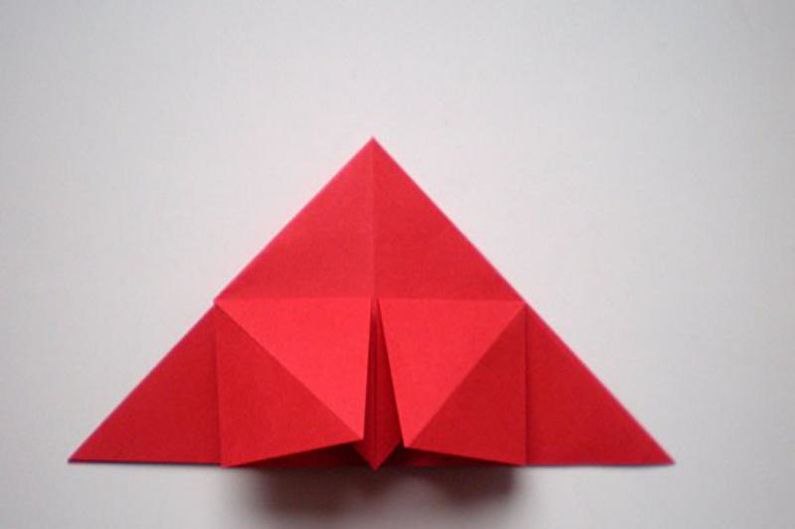
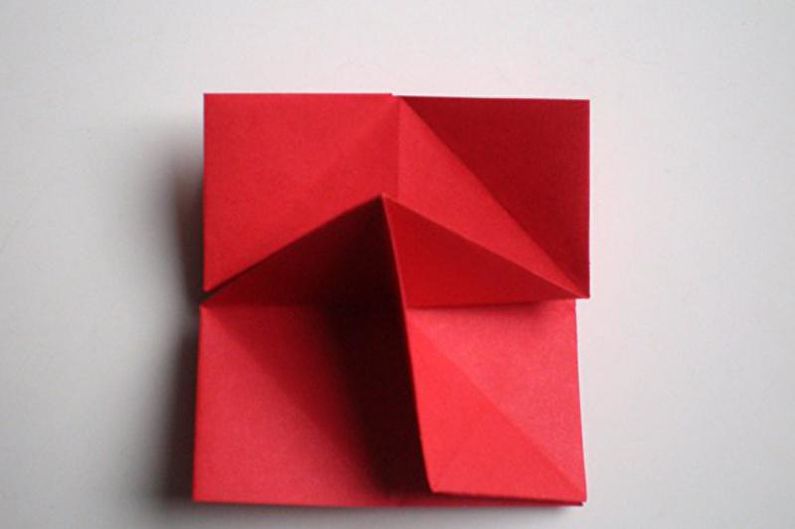
Origami is a classic Japanese art of folding shapes from a rectangular sheet of paper. No glue or scissors are used.
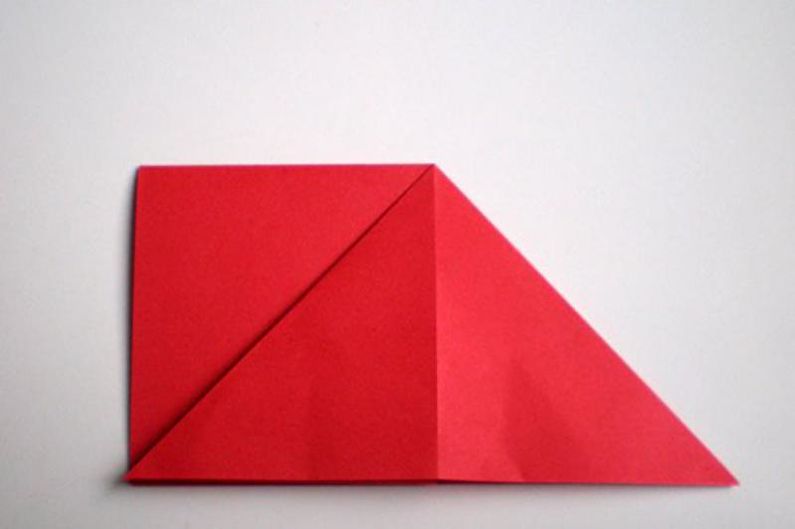
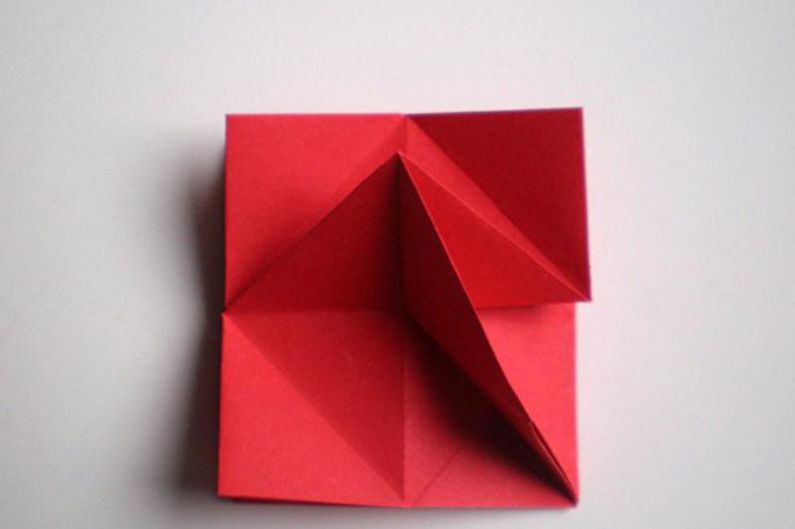
1. Fold the prepared square sheet in half.
2. Fold again from right to left.
3. Expand the top square to get a triangle
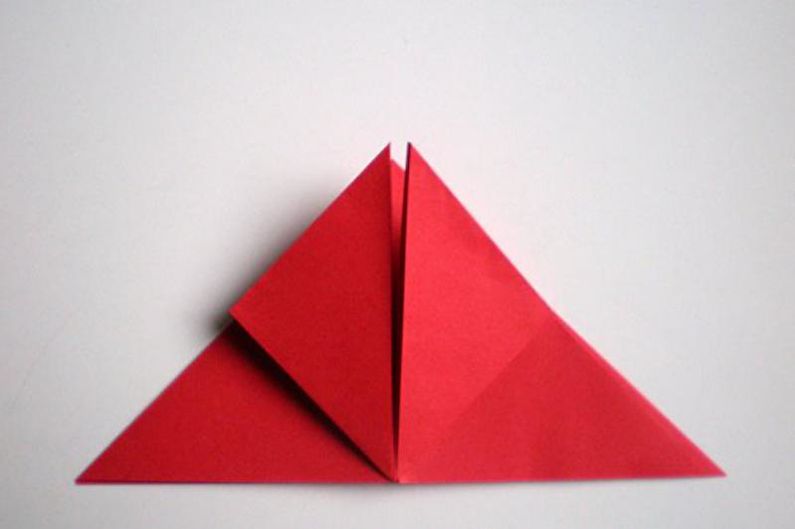
4. Turn the workpiece over and transfer the square from the right to the left.
5. Perform step number 3.
6. Bend the corners to the center line.
7. Bend the small triangles and turn them back.
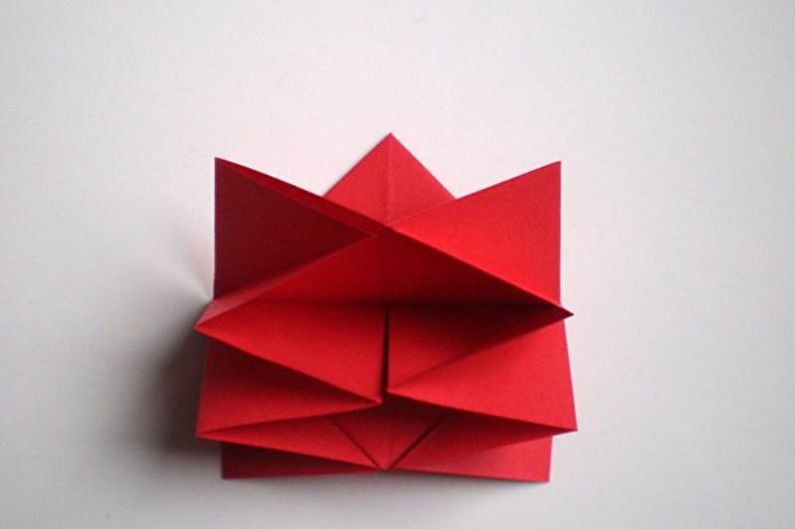
8. Expand them and make squares.
9. Bend the free upper corners down. Repeat for each square.
10. Turn over the workpiece and repeat steps 6–11.
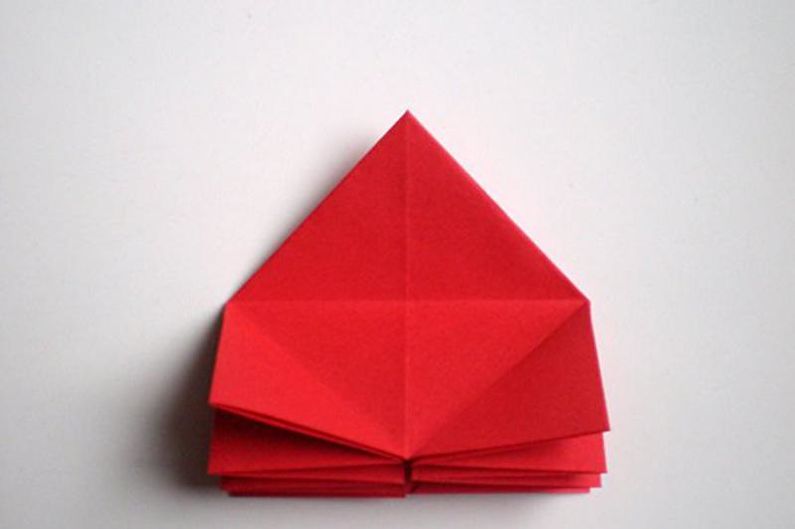
11. Fold the top corner down.
12. Open the workpiece to add volume.
13. Take two central corners and open them, aligning in one plane. Turn over.
14. Bend the upper triangle to the center line so that it is perpendicular to the square.
15. The upper corner of the lower square, located on the right, bend down diagonally.
16. Rotate the result of your work 180 degrees and repeat the steps from the previous paragraph.
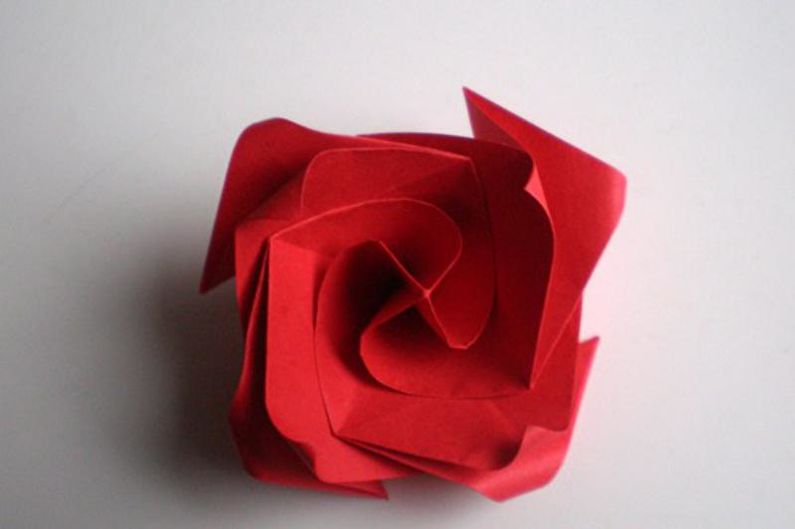
17. Take the future rose and begin to twist the walls to shape the flower.
18. Using a toothpick or tweezers, bend the petals as desired.
If you did everything right, then you will get a very beautiful rose from one piece of paper.
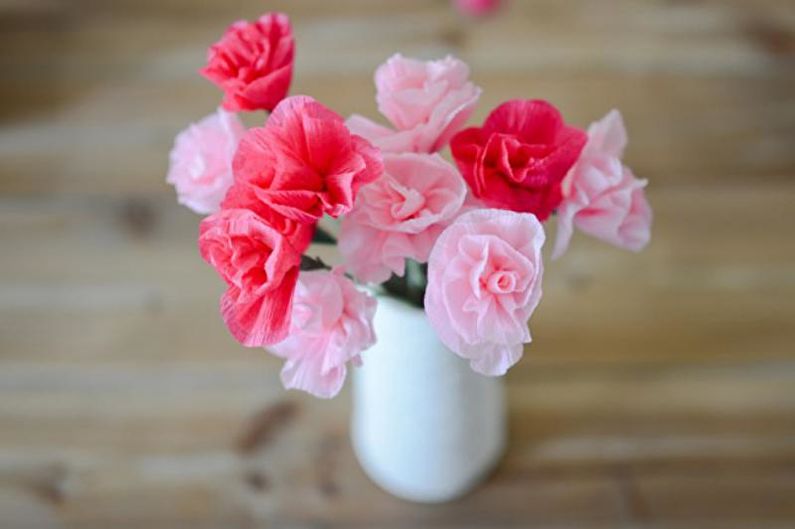
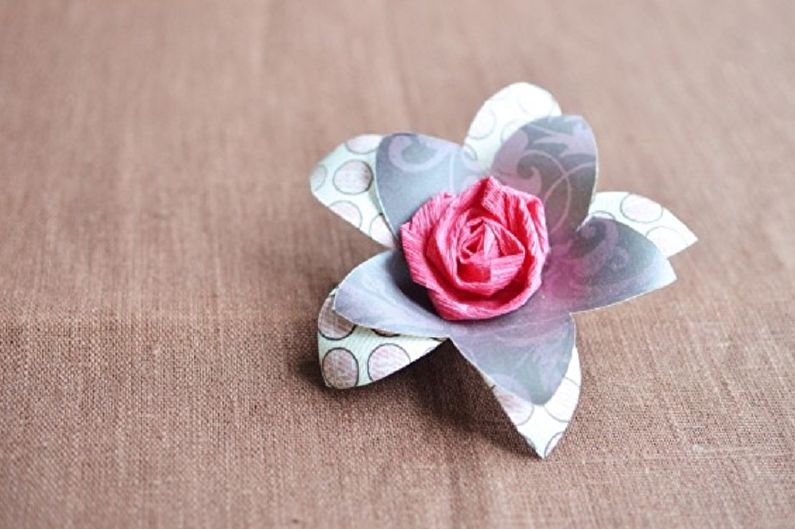
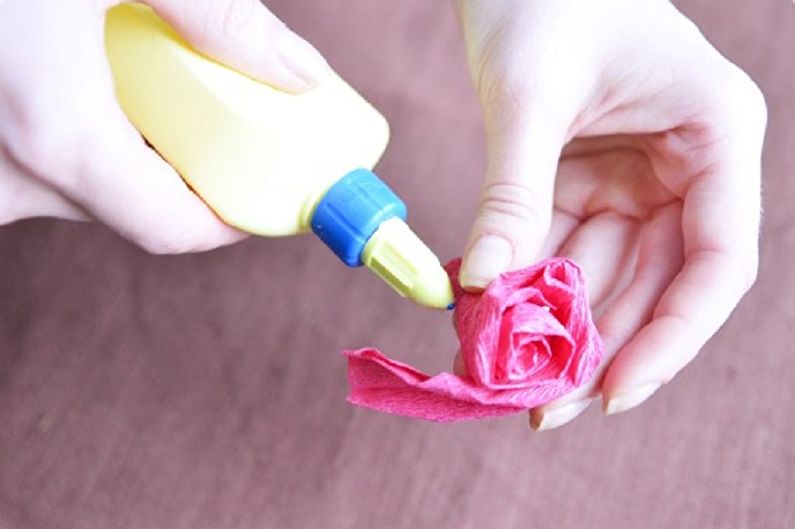
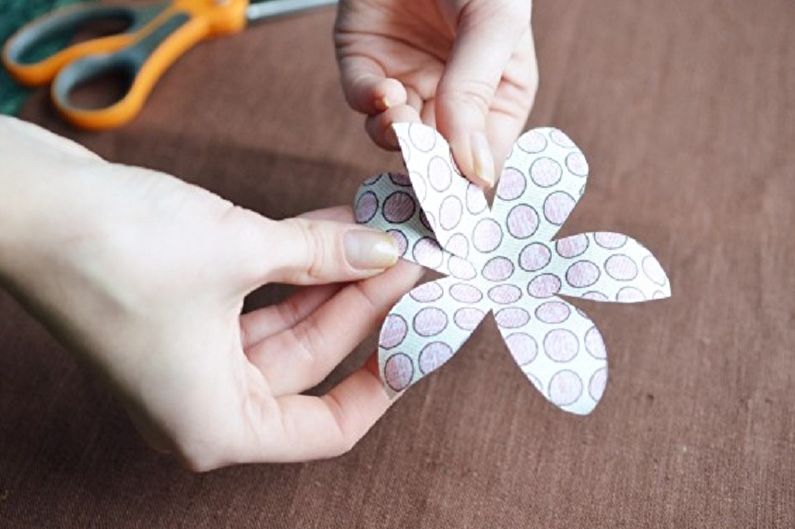
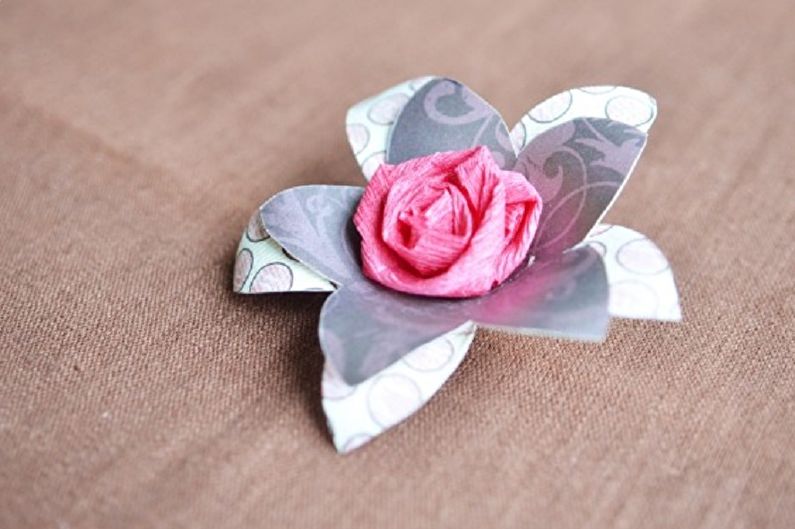
Layered paper rose
A rose with interesting lining in the form of flowers will serve as an original decoration for a gift wrapper or as an interior decor. It is made simple, and the result is very presentable.
What you need: corrugated paper, thick paper with patterns, glue, scissors, double-sided tape.
Cut flowers with 5-6 petals from thick paper. The form can be arbitrary, if it is unusual, it will turn out very original.Cut the petals to the very middle and lay the pieces on top of one another, fixing the result with tape. So you get the volume.
Next, form the rose itself. Cut a strip of corrugated paper with an aspect ratio of 5: 1. Tightly twist the beginning, forming the middle. Then roll up the rest of the tape and glue the tip. Finally, glue the rose with the rest of the details. Done!

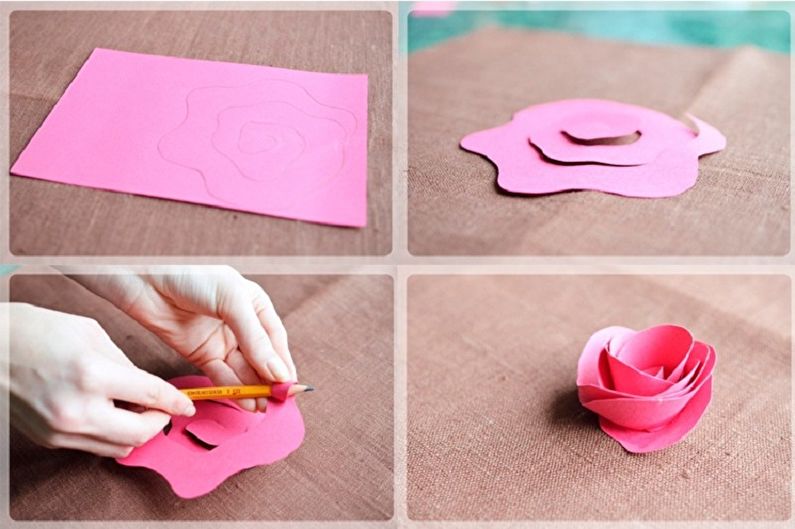
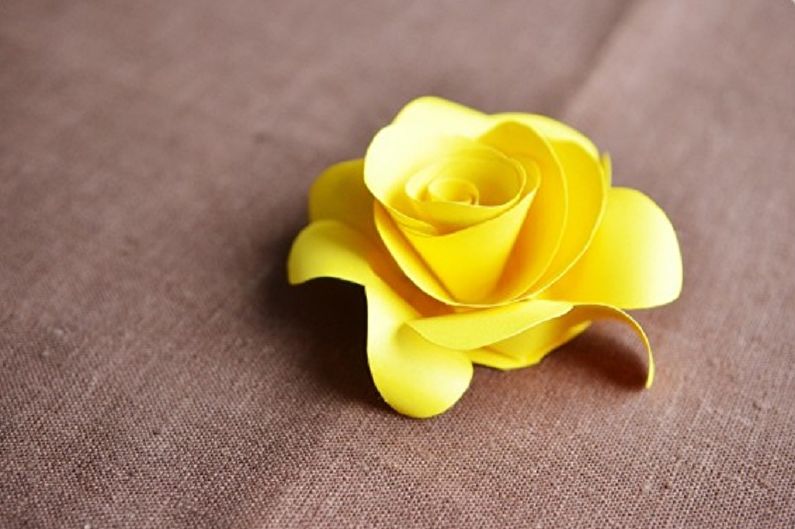
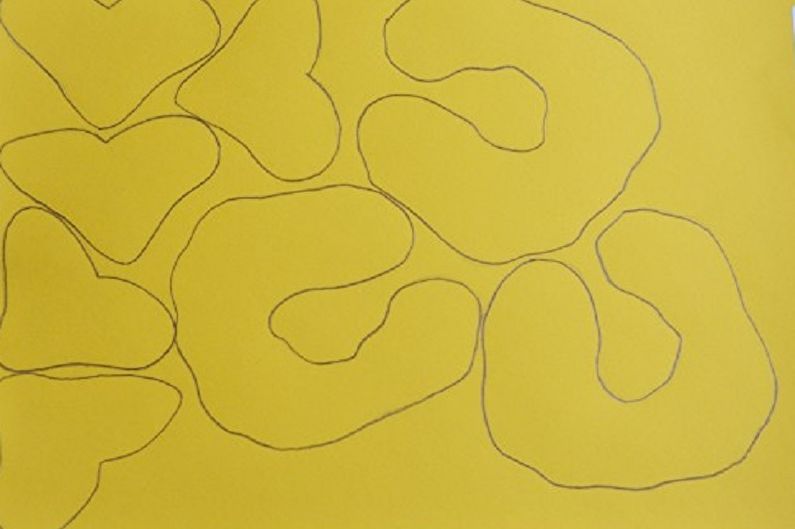
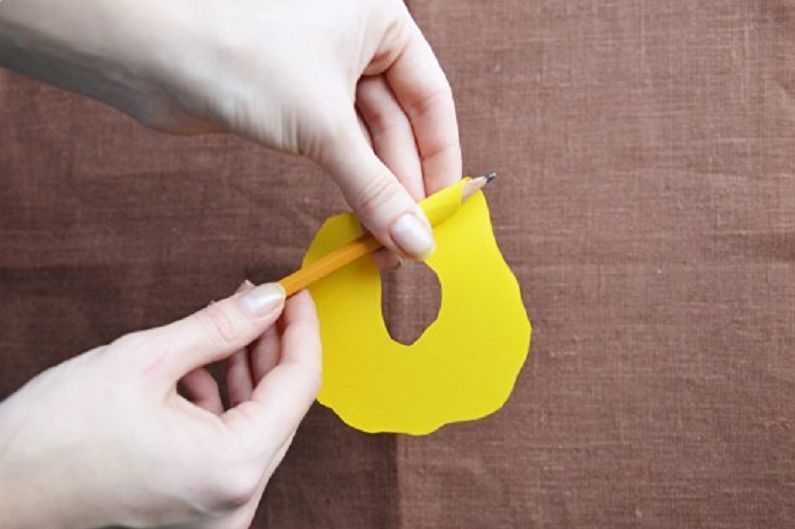
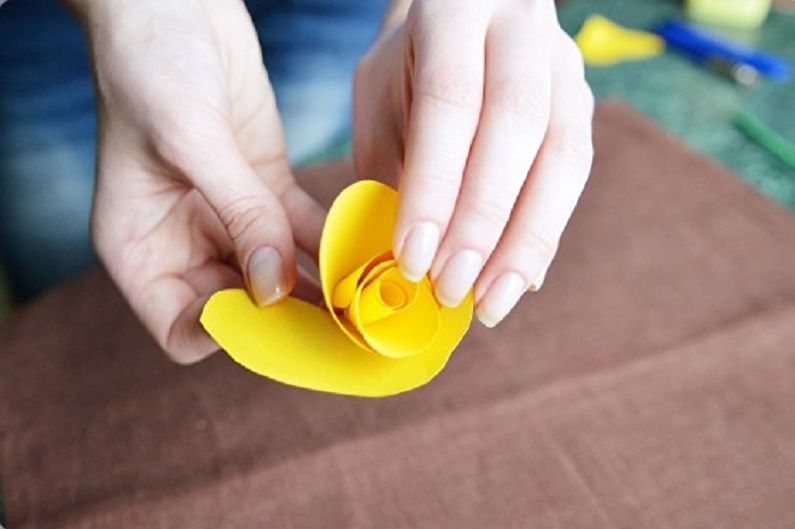
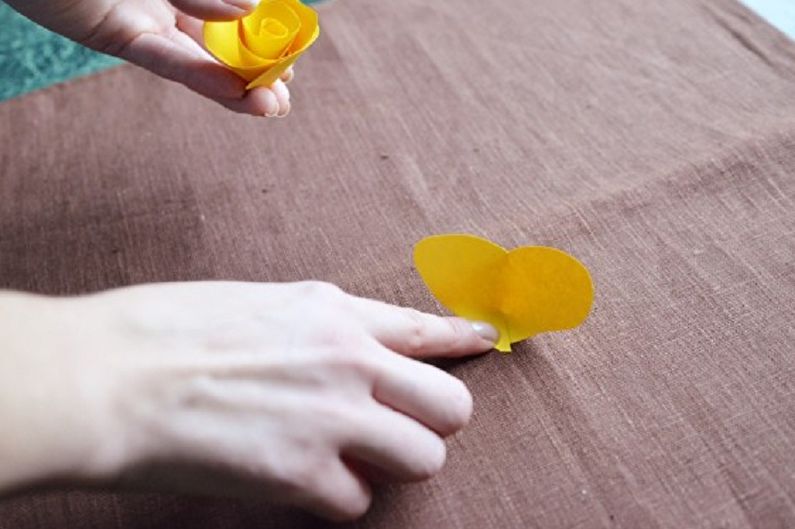
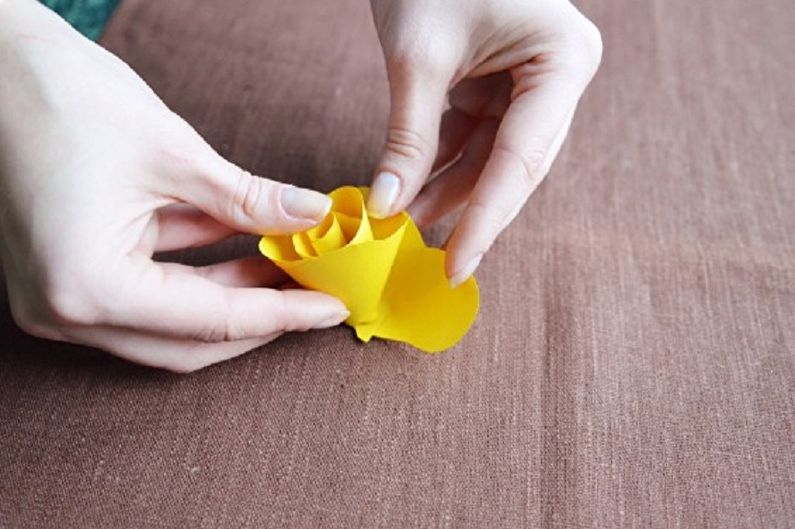
Yellow paper rose
The finished flower looks very textured and delicate, and as a whole is suitable for decorating any item. Of course, colors can vary, but for the best effect, choose unobtrusive candy shades.
Materials for crafts are extremely simple - it is thick paper, scissors and glue.
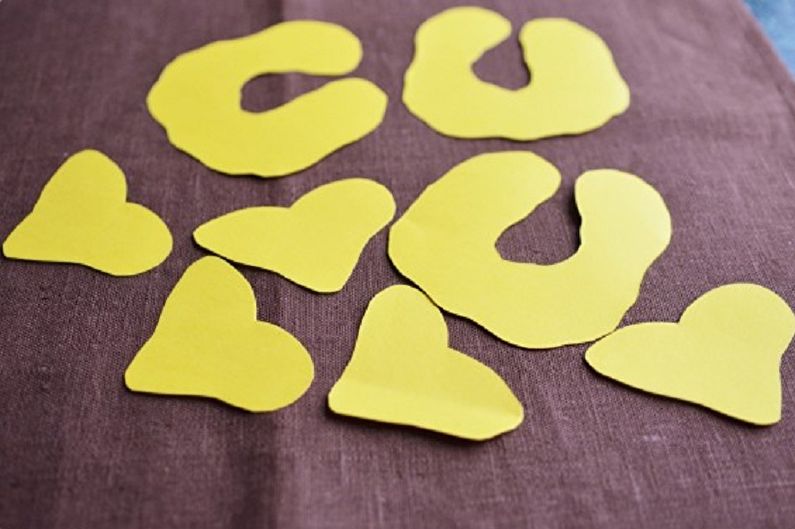
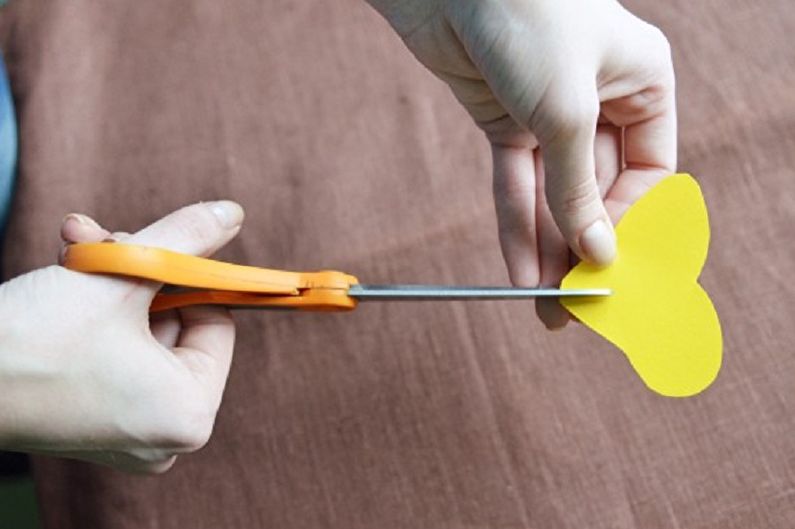
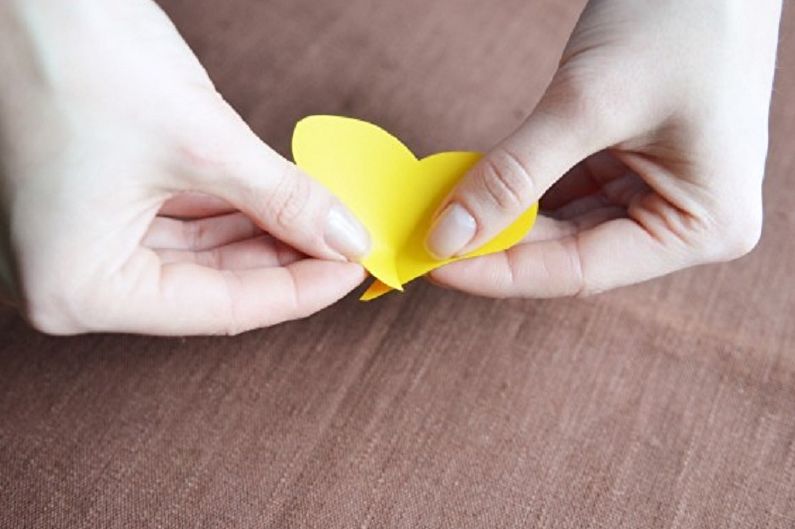
Outline the petals on paper: 5 hearts and 3 “bagels” in any shape. Cut them out. Make shallow cuts in the middle of the hearts. Put the formed tips on top of one another and glue them together. Take a wooden stick or pencil and twist the other three elements around them - it turned out the middle. The ends also glue. Attach the heart-shaped petals to the center of the craft one at a time. Glue a small circle to the bottom of the rose, so that the flower turns out to be stable, and it can be used as a part to decorate the desired object.

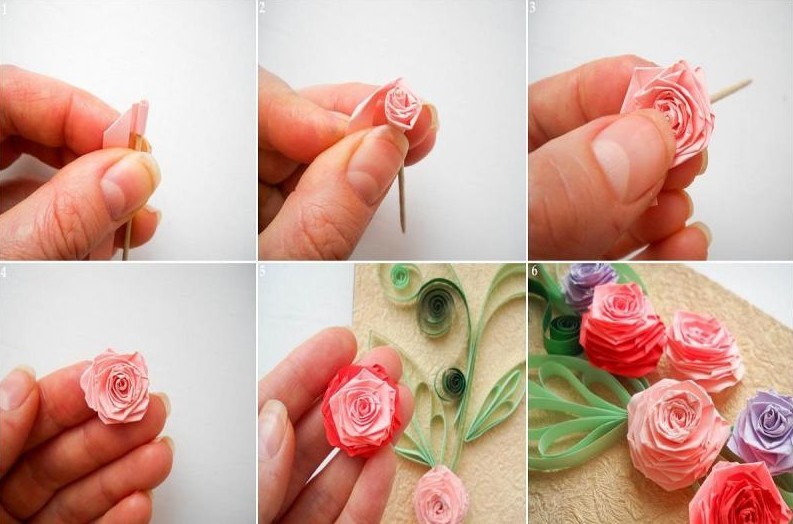
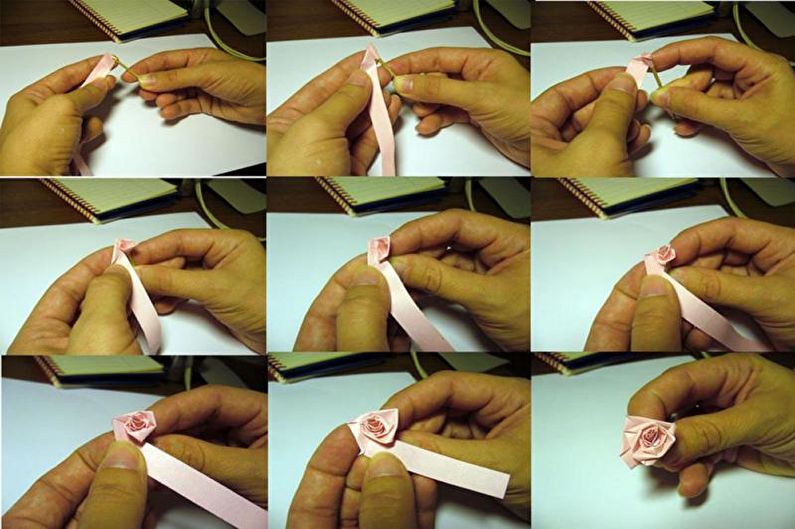
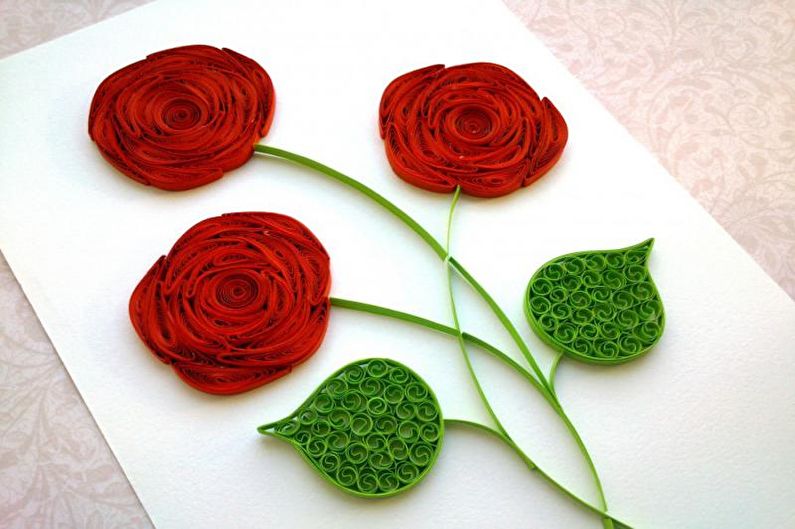
Rose quilling technique
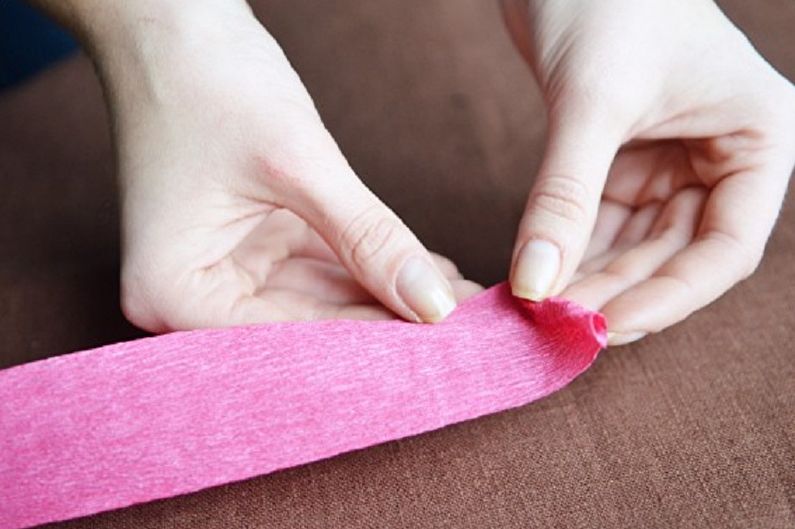
Paper-rolling has arisen in the era of the Late Middle Ages, however, the technology reached the highest peak in popularity in our time. Quilling decorates postcards, gifts, home decoration and even clothes! The level of difficulty in making this or that composition varies quite a lot, and if you are a beginner in this business, a simple rose craft will come in handy for you.
So, you will come in handy: a ribbon of color xerox paper 1x20 cm, a toothpick, sewed ordinary or special for quilling (you can do without it), glue, scissors.
Tightly start the tape at 3 turns using an awl or manually. Fix the result with glue. Fold the strip at an angle of 45 degrees and make a circular revolution. Repeat the procedure, while each turn is fixed with glue. Wrap the tip in the base of the rosette and glue it. If you decide to use an awl or a toothpick, then the entire procedure is performed directly on his needle, and at the end of the process, leave the craft on it until the adhesive dries.
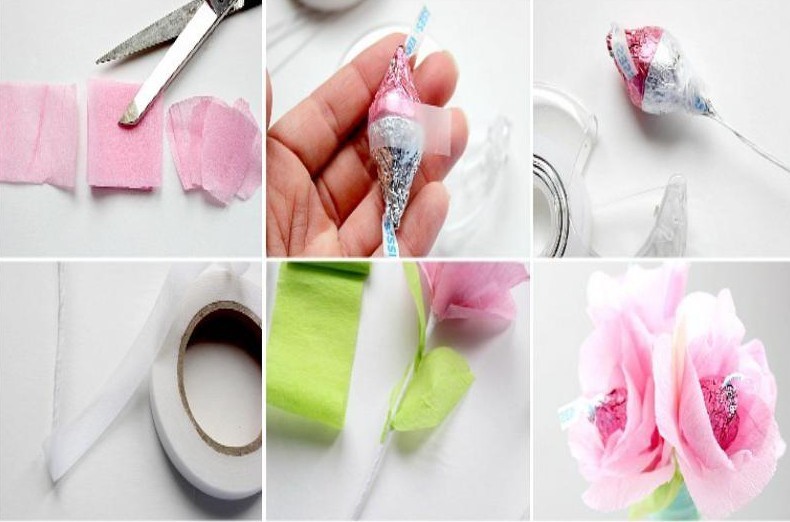
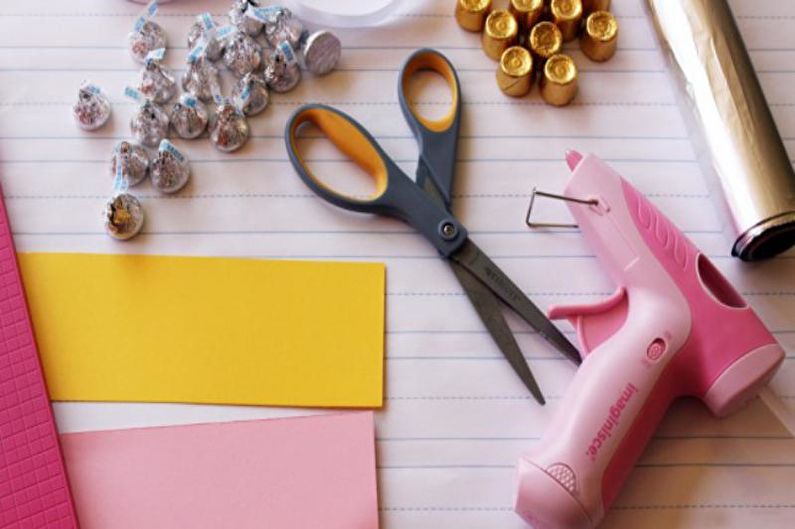
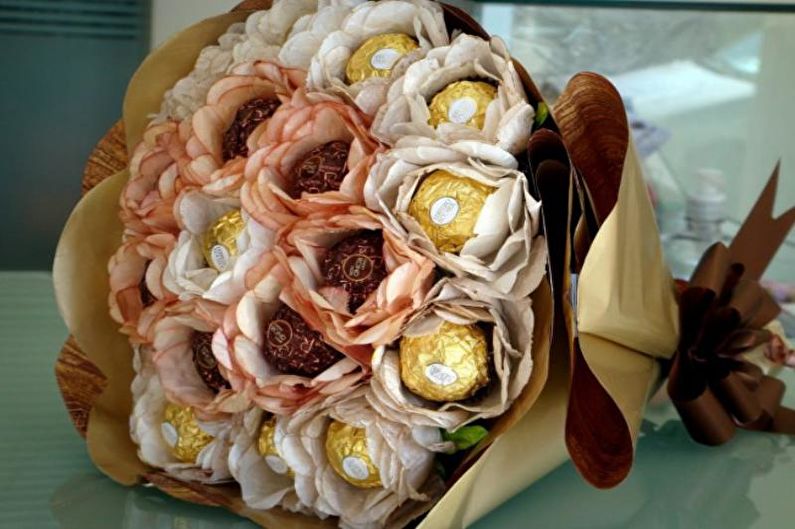
Do-it-yourself rose with sweets inside
An unusual and undoubtedly memorable gift will be a bouquet of roses, in which delicious sweets are hidden. No one will remain indifferent to such a spectacular present.
Before starting work, prepare the following tools and materials: for the manufacture of flower and leaves - corrugated paper; scissors, floristic wire and ribbon; strong enough threads; and, of course, a little tidy candy!
Cut five rectangles with parameters: width - 6 cm, height - 7 cm, and six with the proportions: width - 4 cm, height - 7 cm. From the resulting rectangles, form petals. Stretching future petals from the center to the edges, you get a realistic shape.
Prepare sepals from green paper. Stretch the paper for each leaflet and tighten the top edge slightly. Using a thread, wind the candies to the wire. Wrap the candy in a wider petal to hide it. Next, wind the base to the wire.
By analogy, wrap the core with the remaining petals. Attach narrower petals in pairs opposite each other. Secure the previously prepared sepals at the base using tape. Done!
Paper Rose Ideas
Do-it-yourself paper roses are a universal decoration. They can be used as an independent element of the decor, folded, for example, in a basket or placed in a vase, or transformed with their help the selected item.We have prepared several ideas that will help decorate the house for the holiday or create unique things for everyday use.
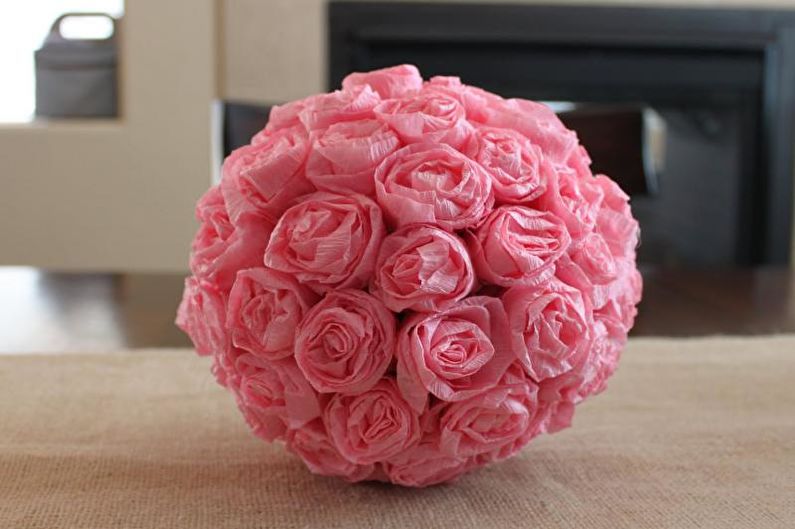
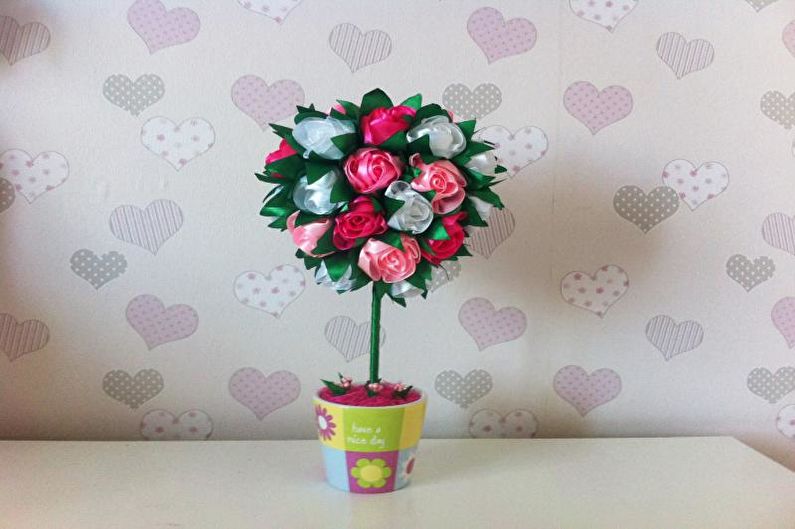
Topiary
Topiary in the interior is, as a rule, an artificially created tree with a round crown. In our case, instead of leaves, an improvised plant will be decorated with roses.
The ball on which the flowers will be placed is made from sisal or bast. You can use anything as a barrel, even an aluminum pipe, you just have to decorate it with a beautiful ribbon of green or brown. Connect the details and string the roses on the ball. The beautiful topiary is ready!


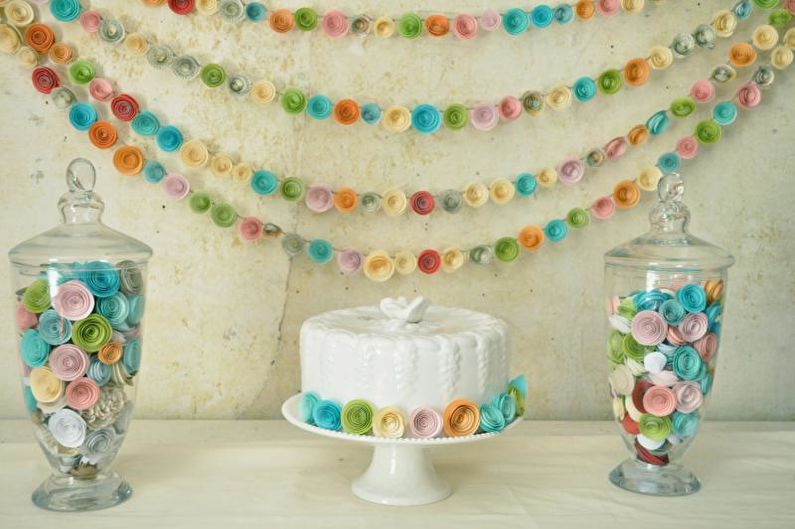
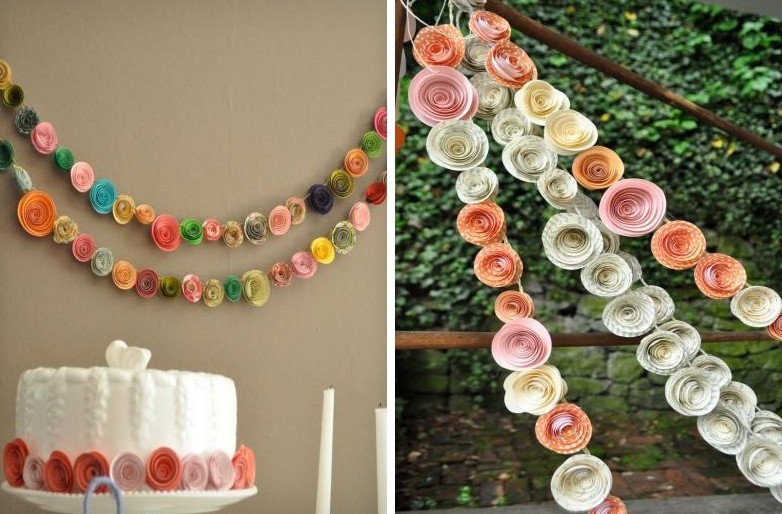
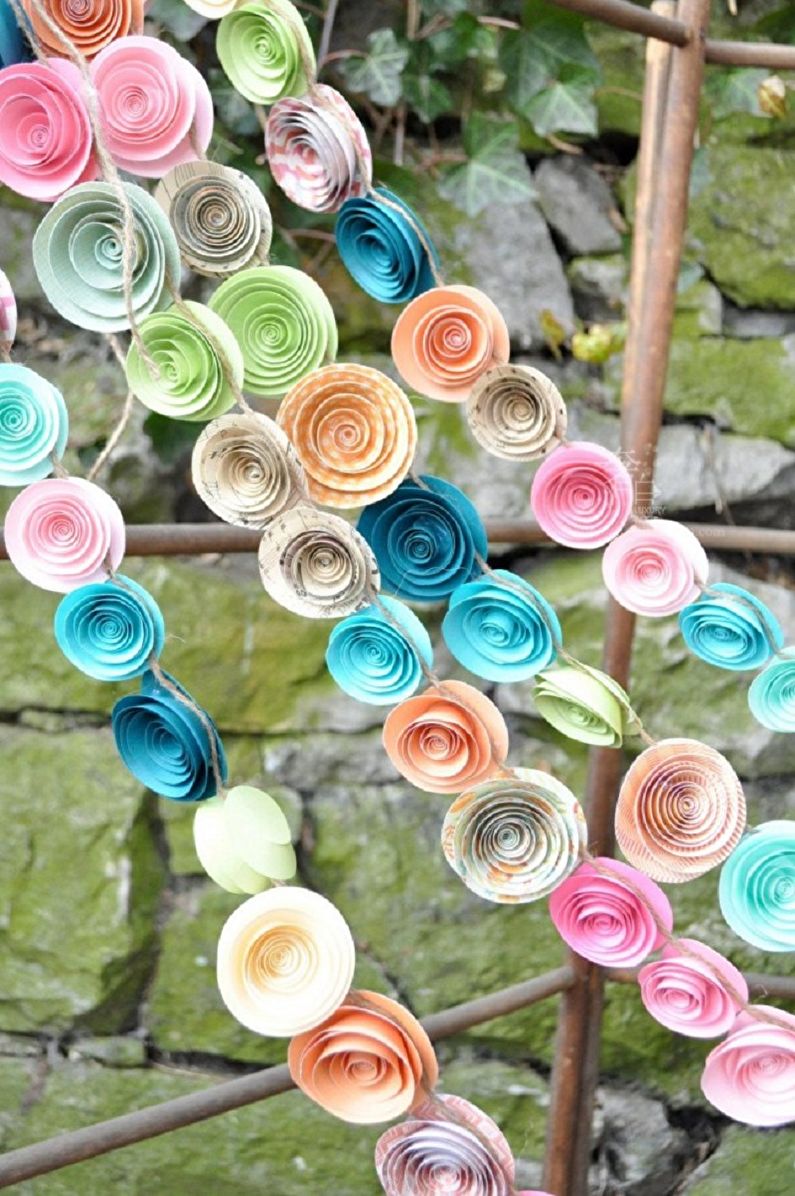
Garland
A garland of roses is a wonderful setting for a wedding, romantic dinner or a bachelorette party. It is best to use them indoors or in calm weather without wind, otherwise it may take an unsightly appearance or even disintegrate.
Spiral roses are perfect for such decoration - they will look presentable, and making such elements is easy. Make holes in the flowers with an awl or needle, and then string them onto a rope or fishing line. Beautiful and easy!
Basket
The composition makes an incredibly spectacular impression! Such a gift will delight any girl, especially since it is made with their own hands. You will need a beautiful basket, a filler as the basis (you can use the same as for the topiary) and the flowers themselves, made of durable material. The basket can be additionally decorated with light paint.
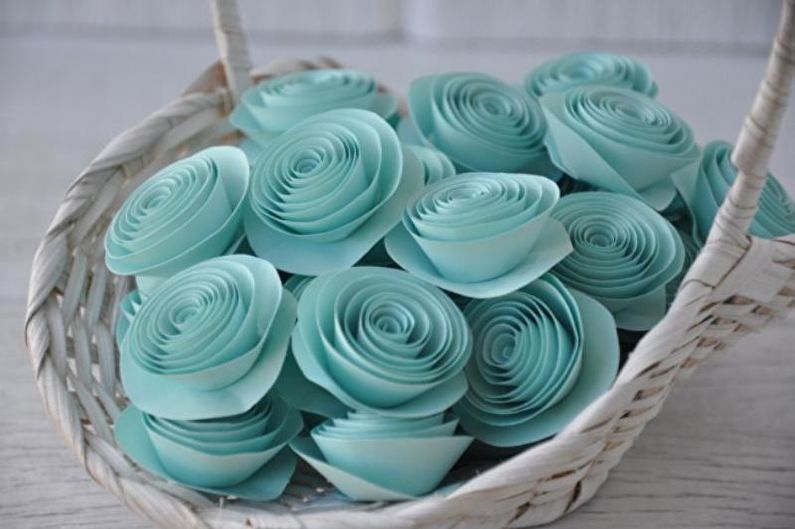
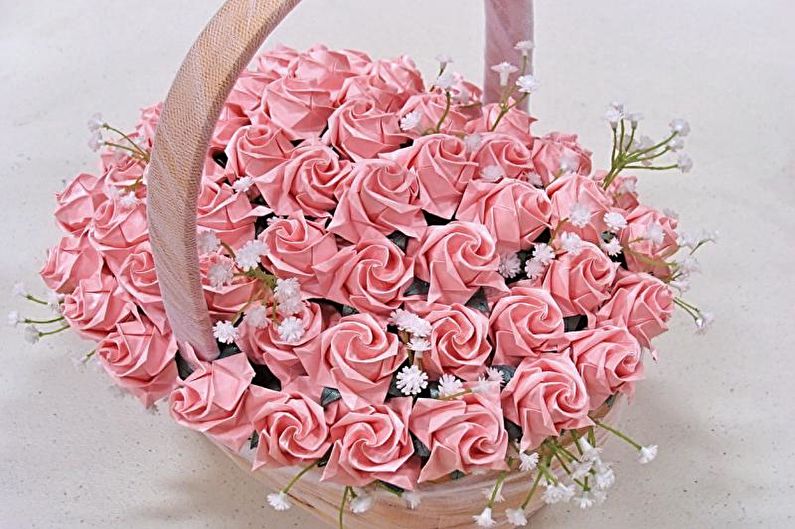
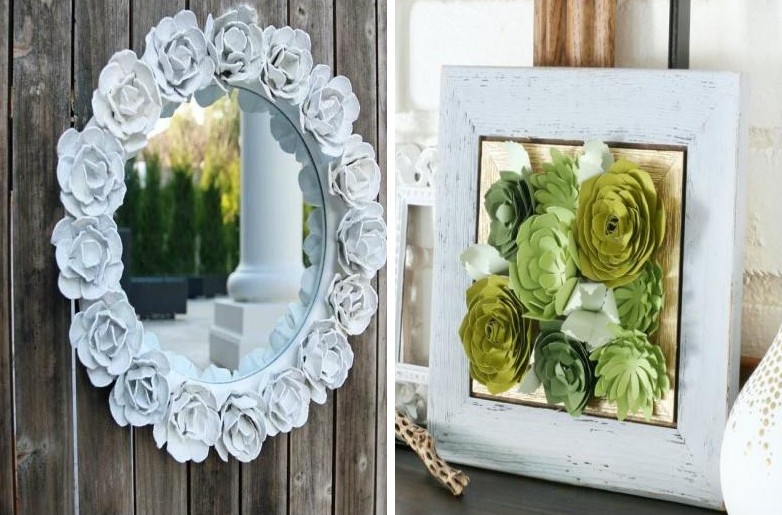
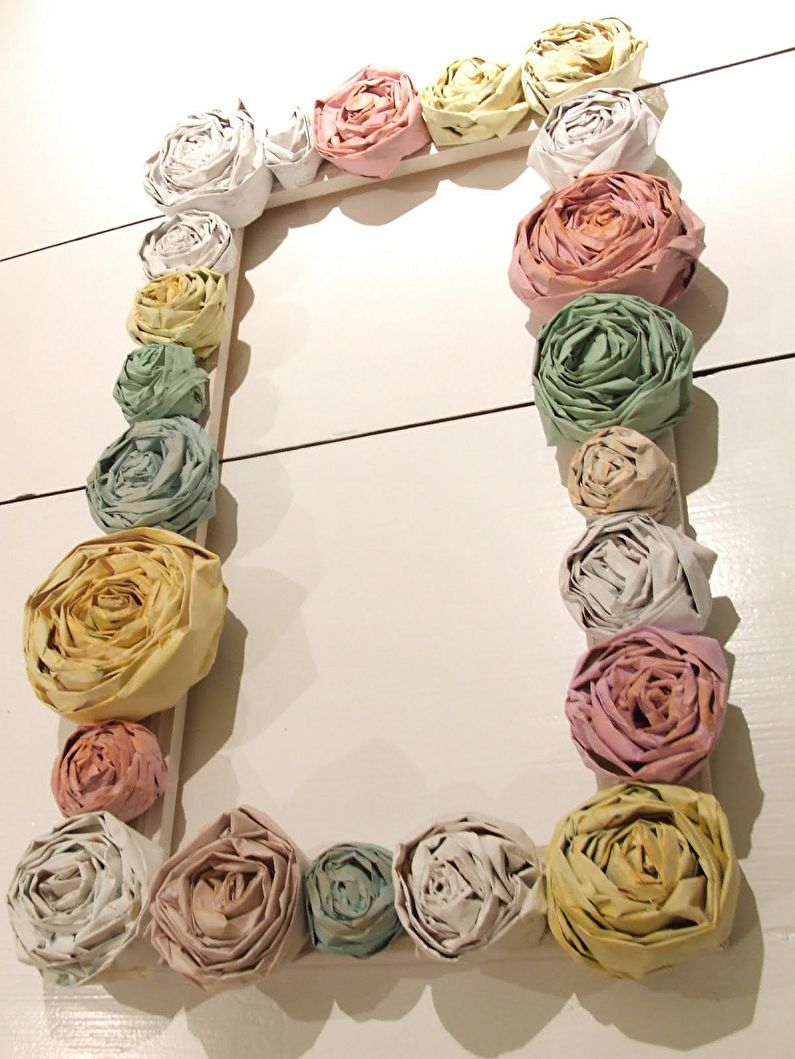
Photo frame or picture
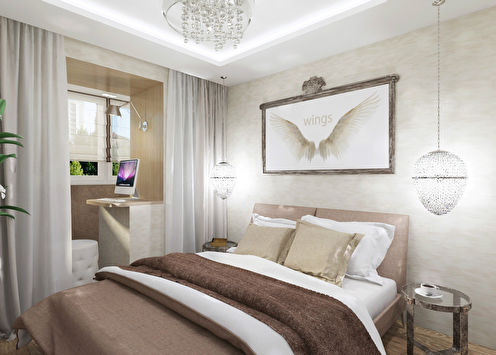
Roses - this is a ready-made decoration, and for decorating a mirror or a frame with a photo you just need to glue the floral details. For example, you can make spring decoration for a round mirror, it will fit perfectly into the interior of the bedroom for a girl, bathroom or children's room.
Try to make roses in different sizes and shades, choosing one color scheme, and then fix them on the frame. The finished composition will look completely self-sufficient, and therefore it can be hung on the wall without a photo inside it.
Make an original picture. Add roses with other colors and stick them on the base. Fill the frame with white paint and make scuffs with sandpaper - this will give you a hint of shabby chic style.
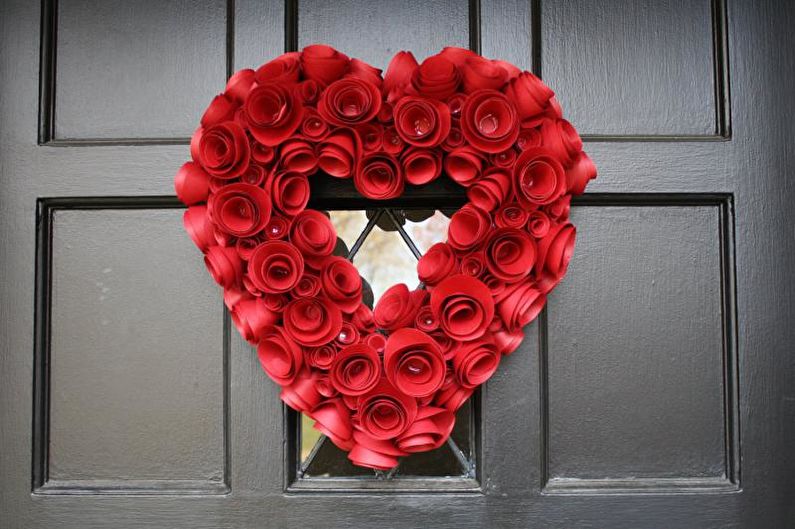
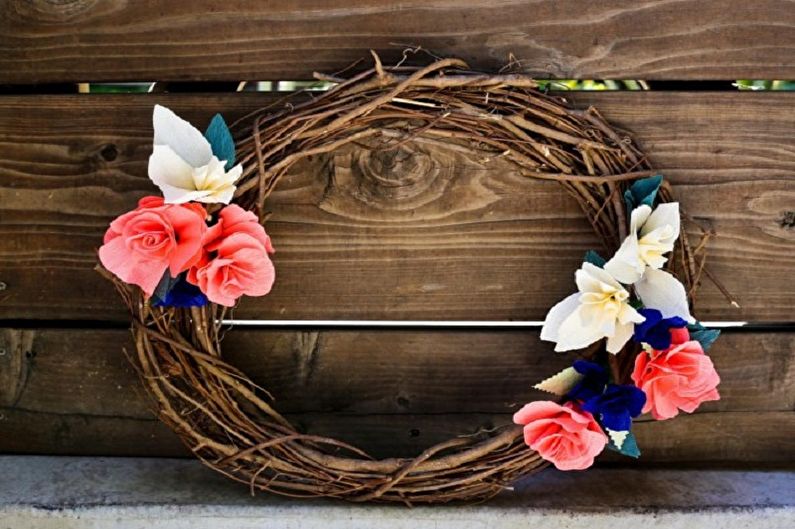
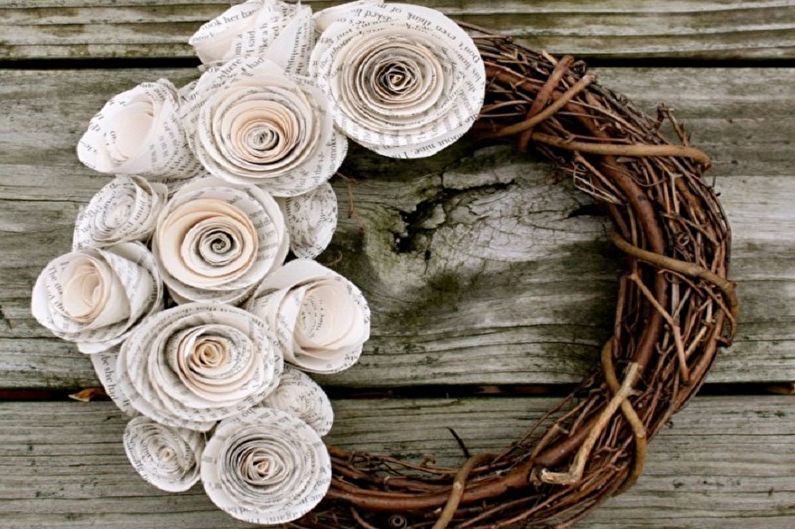
Wreath
If you want to place a pretty wreath in a room with wood trim, then you can weave it from a vine yourself, and make roses from magazine sheets with text or from a material with a natural shade.
A heart-shaped wreath also looks very beautiful, which can be hung on the door to Valentine's Day. Do not be afraid to experiment: try to design a composition on an ordinary embroidery hoop, complement spiral roses with other small pieces of paper, and you will get a wonderful accessory in the room for the little princess.